1.3 - Integrate NeuralSeek Custom Extension
Add NeuralSeek as a Custom Extension
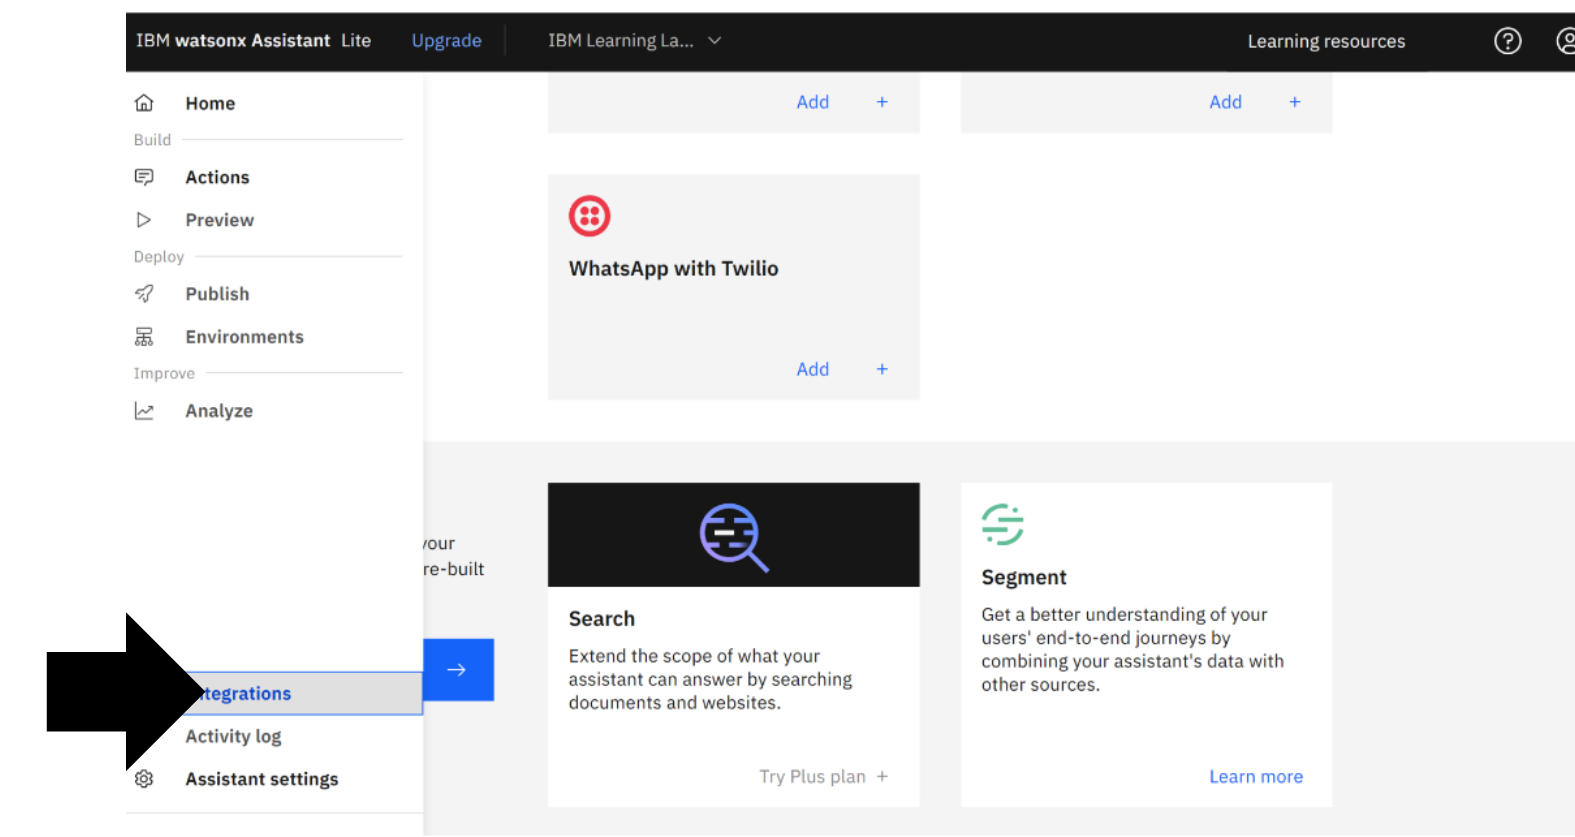
Open Integrations
On the left menu, click “Integrations.”
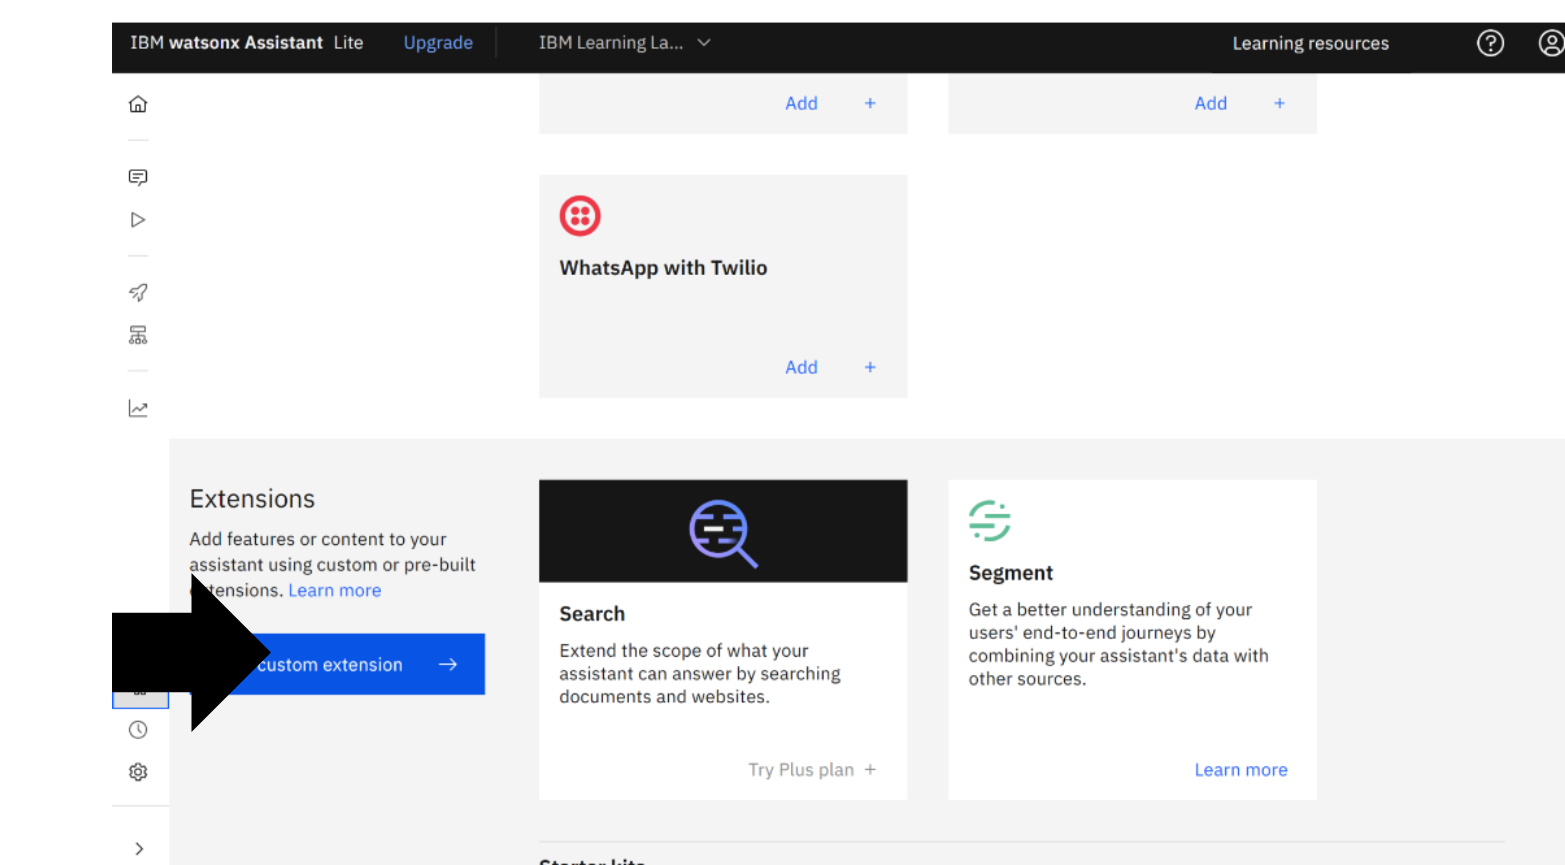
Open Custom Extensions
Click “Build custom extension.”
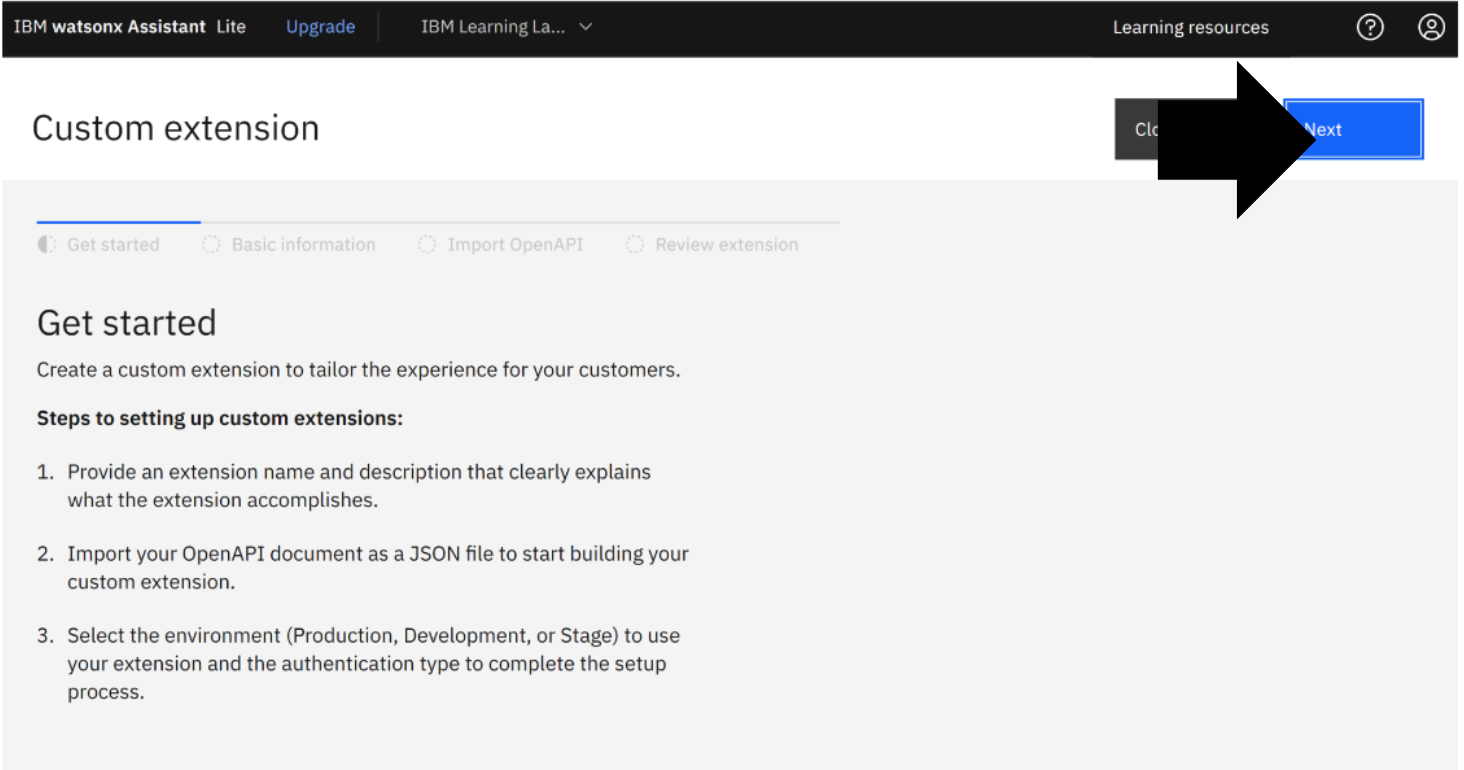
Custom Extensions Get Started
Read the custom extension page “Get started.” Click “Next.”
Basic Information
- (a) Enter in basic information, in this example the extension name is, “IBM Learning Lab: NeuralSeek with Watson” and the Extension description is, “Participants work with NeuralSeek and Watson on AI services, gaining valuable insights into these technologies."
- (b) Click “Next.”

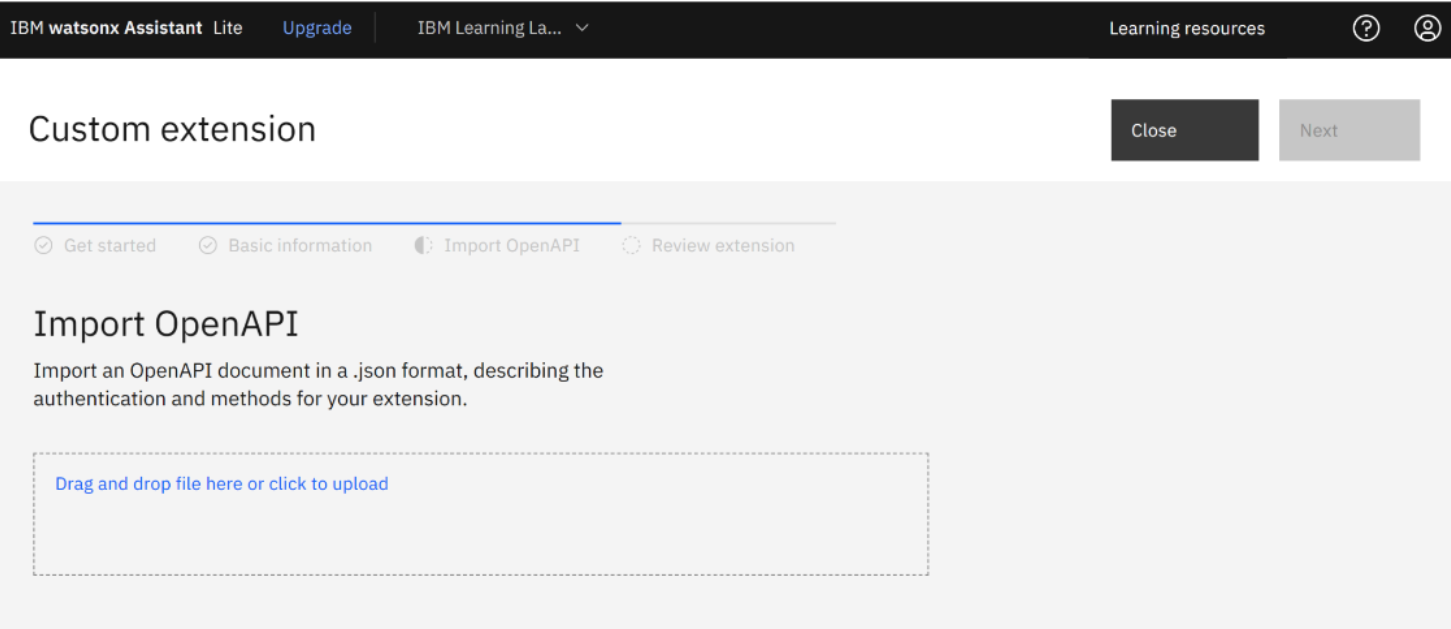
Custom Extension Import OpenAPI
To proceed you must add the NeuralSeek API file in the box “Drag and drop file here or click to upload.”
Download the NeuralSeek OpenAPI file
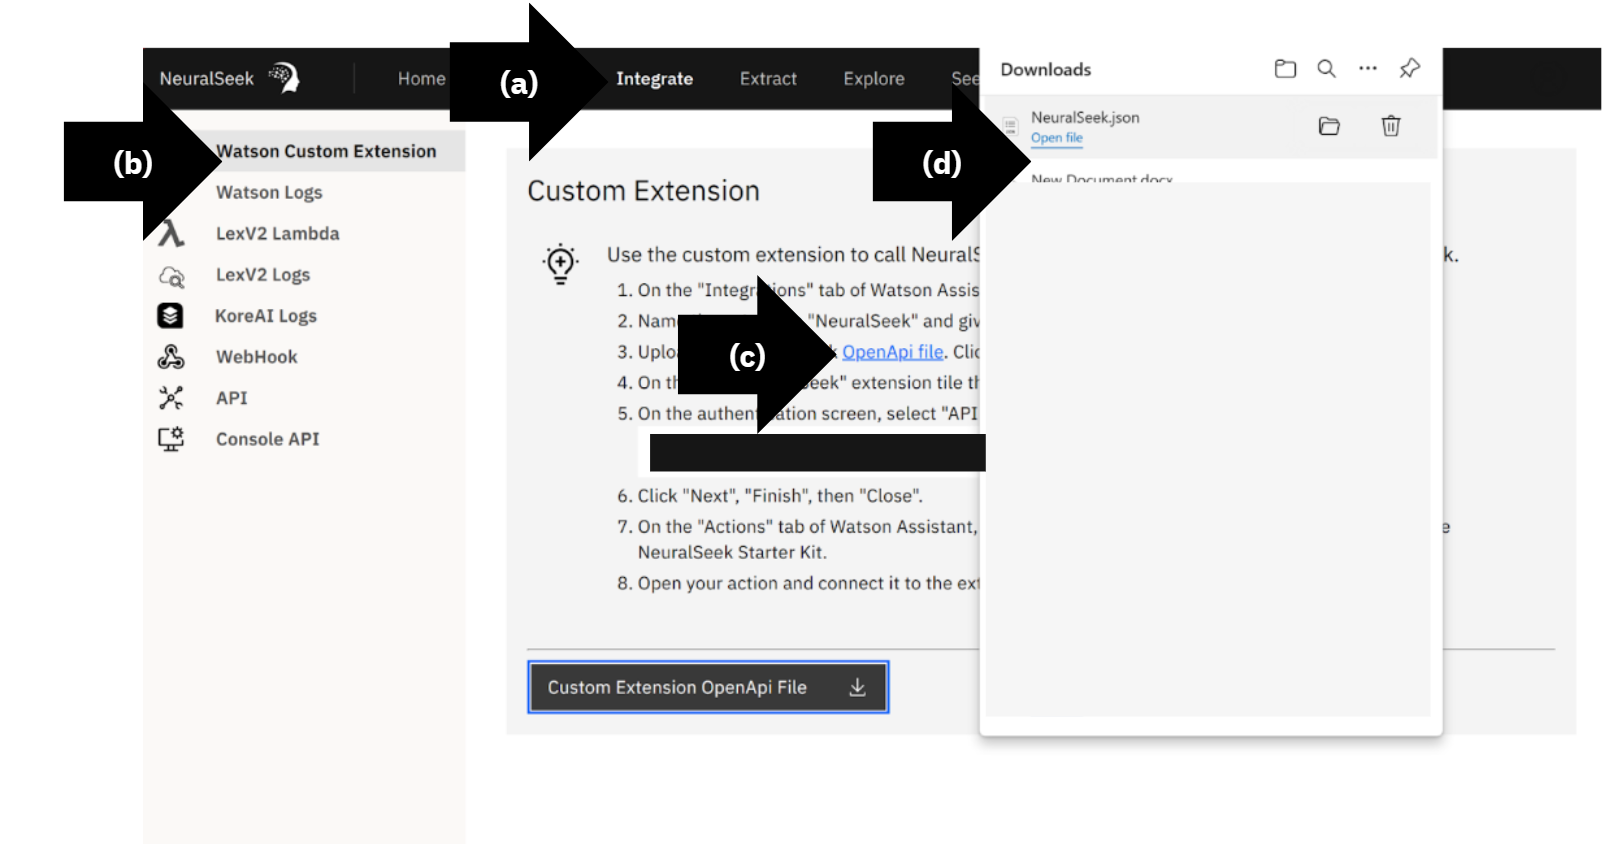
Navigate to the NeuralSeek user interface.
- (a) On the top menu, click “Integrate”
- (b) On the left menu, click “Watson Custom Extension.”
- (c) To download the file, click “Custom Extension OpenAPI file.
- (d) View the downloaded json in the computer download menu.
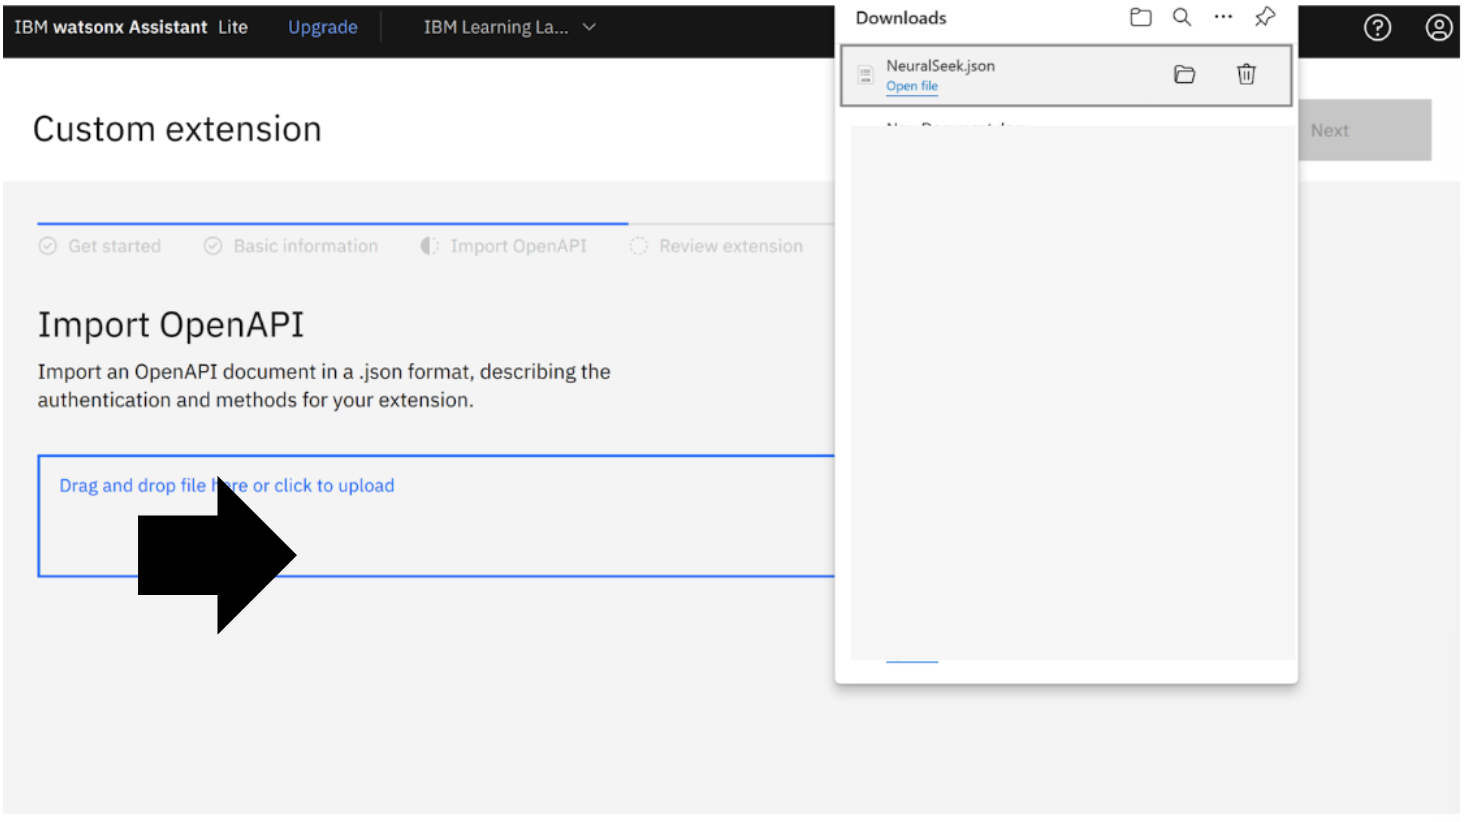
Upload the OpenAPI file
Return to IBM watsonx Assistant Custom extension page.
Drag and drop or click and upload the NeuralSeek.json file into the Import OpenAPI box.
Complete Upload
View NeuralSeek.json file. Click “Next.”

Complete Custom Extension
Review extension. Click “Finish.”

NeuralSeek is now added as a custom extension and integrated with the virtual agent IBM watsonx Assistant. Next, we need to authenticate the extension.
Authenticate NeuralSeek with watsonx Assistant
Get Started
Authenticate NeuralSeek with watsonx Assistant. In this example it is, “IBM Learning Lab: NeuralSeek with Watson”.
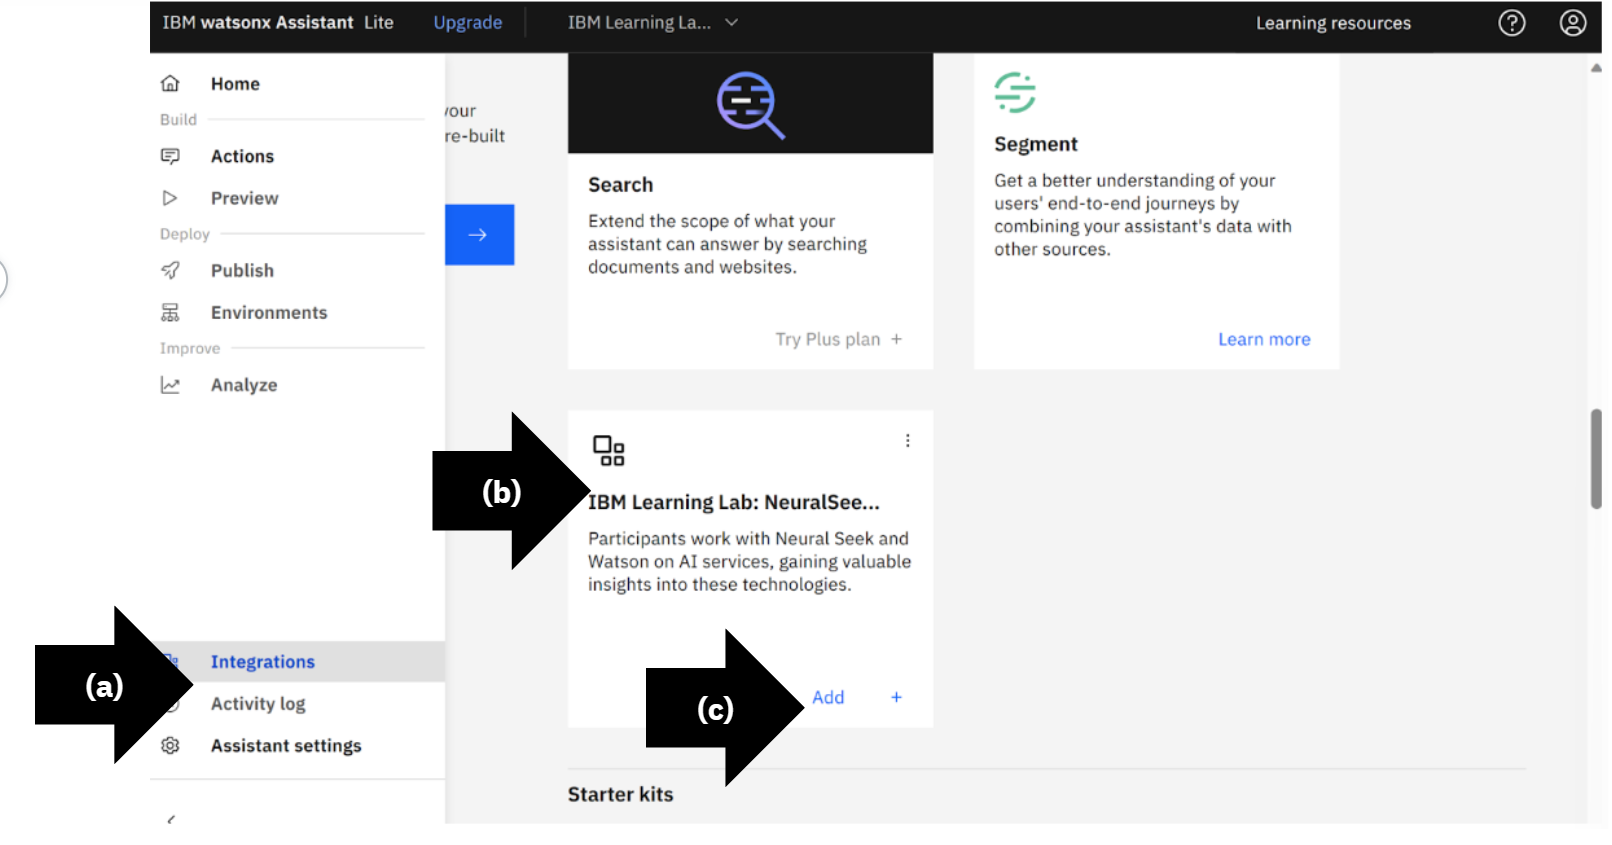
Navigate to Integrations
- (a) On the left menu, select “Integrations.”
- (b) Search for the custom NeuralSeek extension, in this example it is, “IBM Learning Lab: NeuralSeek and Watson.”
- (c) Click “+add.”
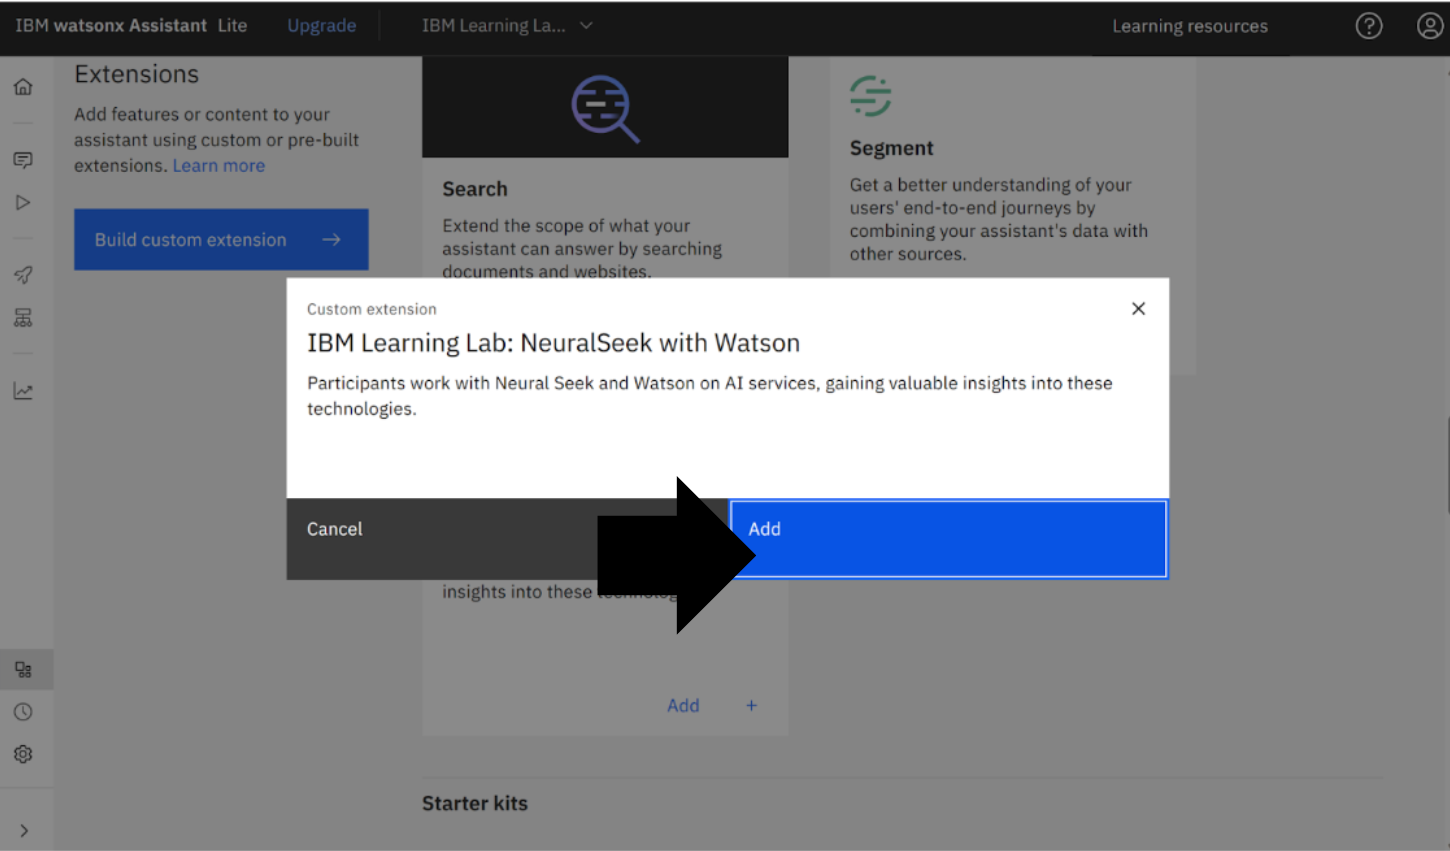
Add Extension
Review custom extensions. Click “Add.”
View Get started. Click “Next”.

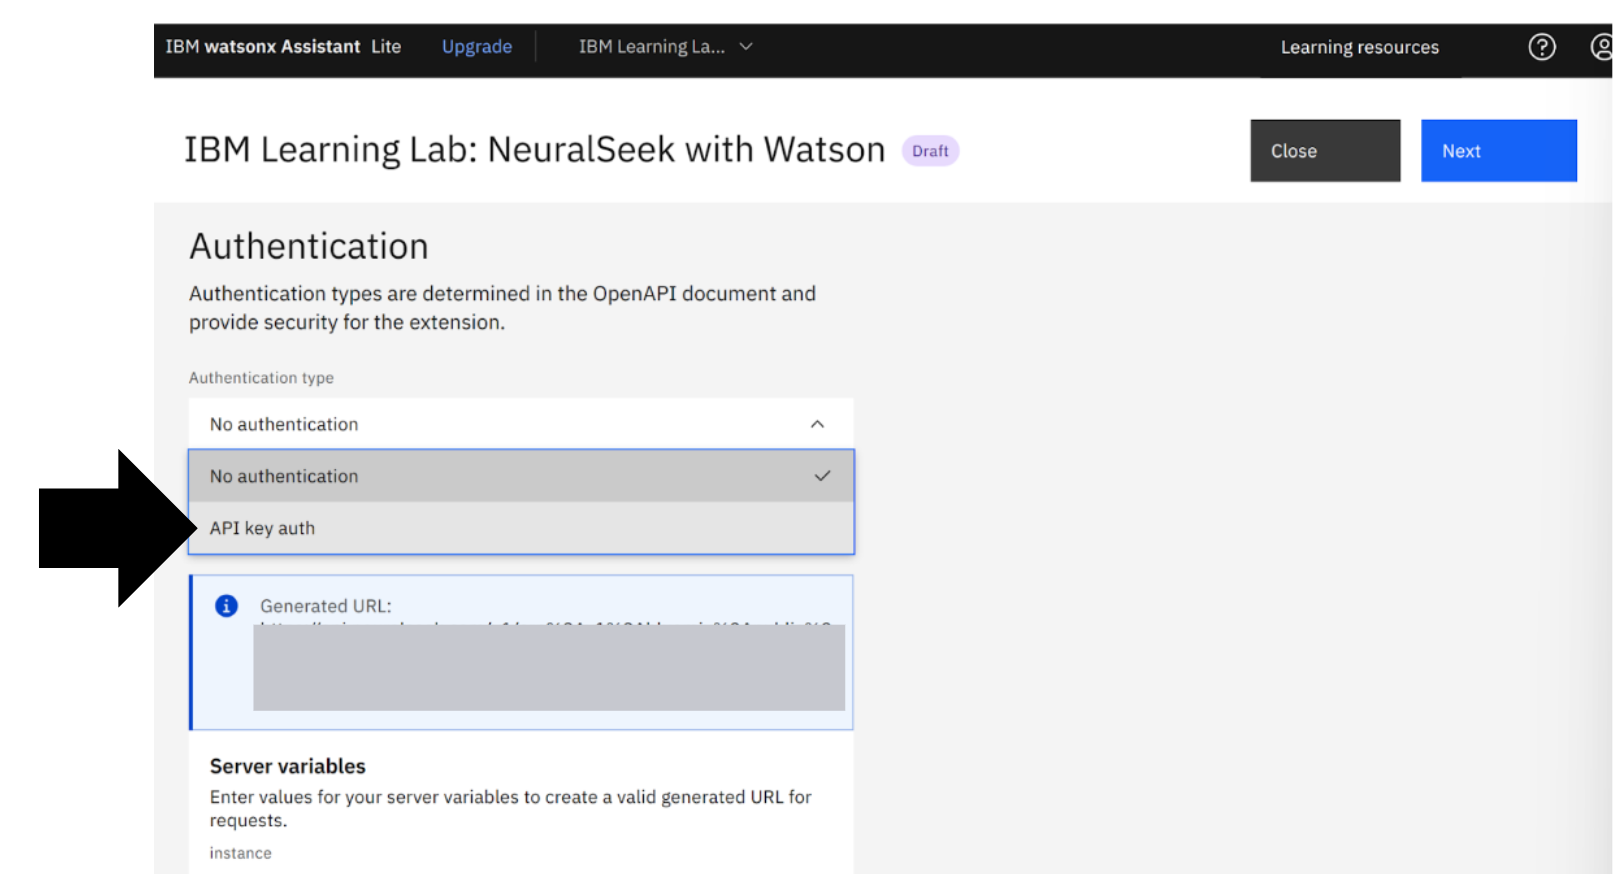
Authentication Page
Select authentication type as “API Key auth.”
Retrieve API key auth from NeuralSeek
Return to NeuralSeek custom extensions. On line 5, copy the API key for the “API key auth”.

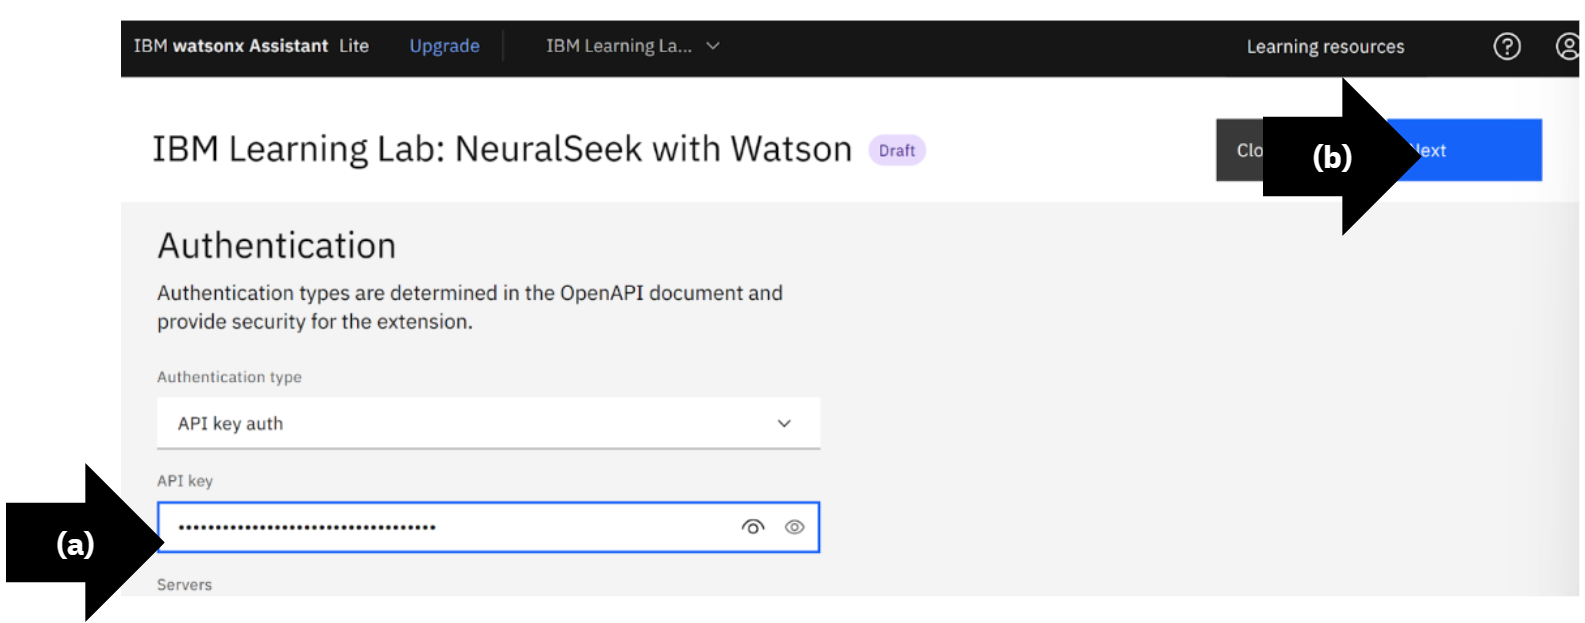
Paste API key
Return to IBM watsonx Assistant.
- (a) Paste the NeuralSeek API key into the API key text box.
- (b) Click “Next”.
Complete the Authentication
Review the authentication. Click “Finish”. When it has updated, click “Close”.
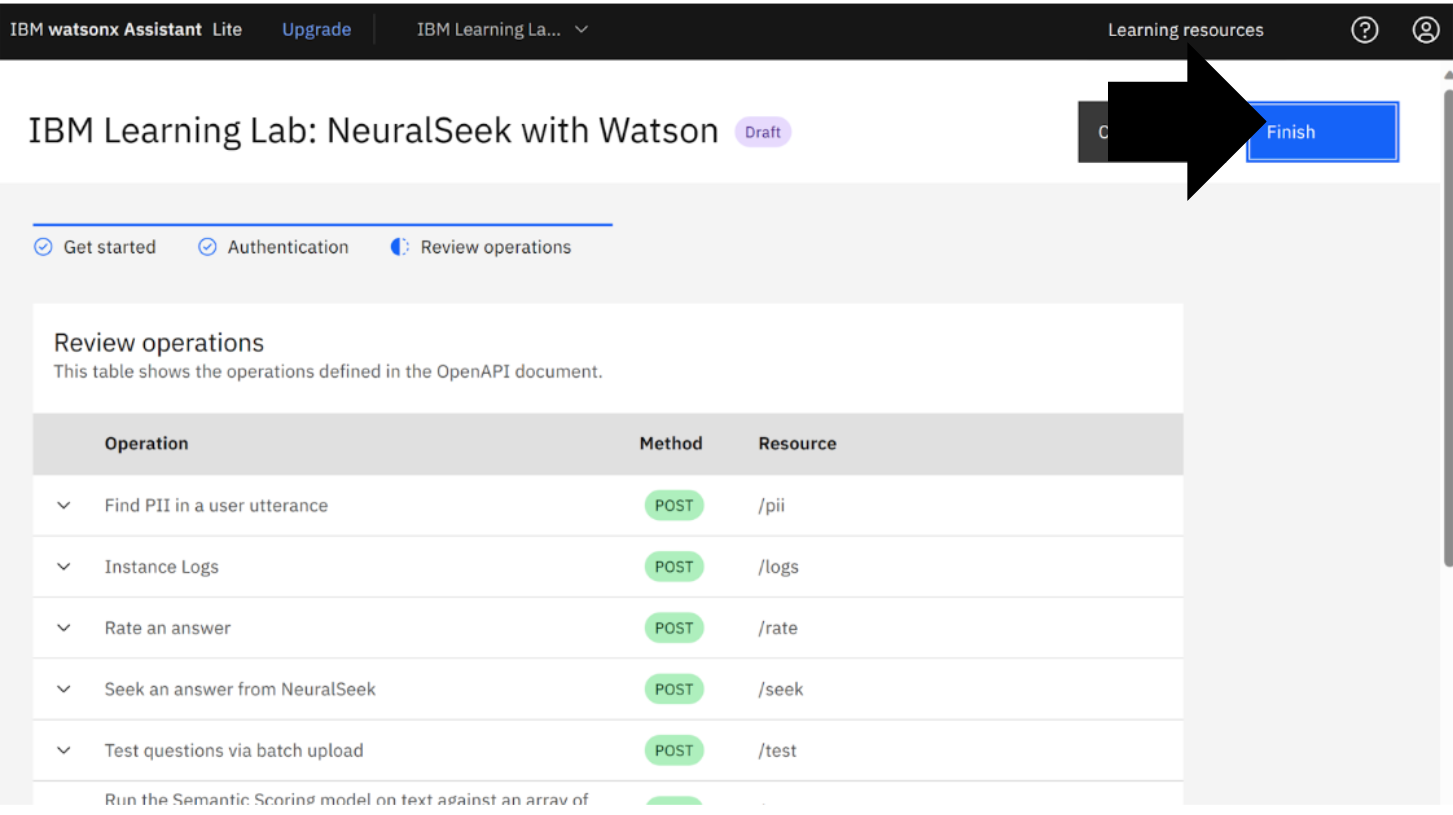
The custom NeuralSeek extension integrated with IBM watsonx Assistant is now authenticated and ready for use.
Add NeuralSeek Starter Kit Actions
Open Actions
Open IBM watsonx Assistant.
- (a) On the left menu, select “Actions”.
- (b) Click “Created by you”.
- (c) Click “Create action”.

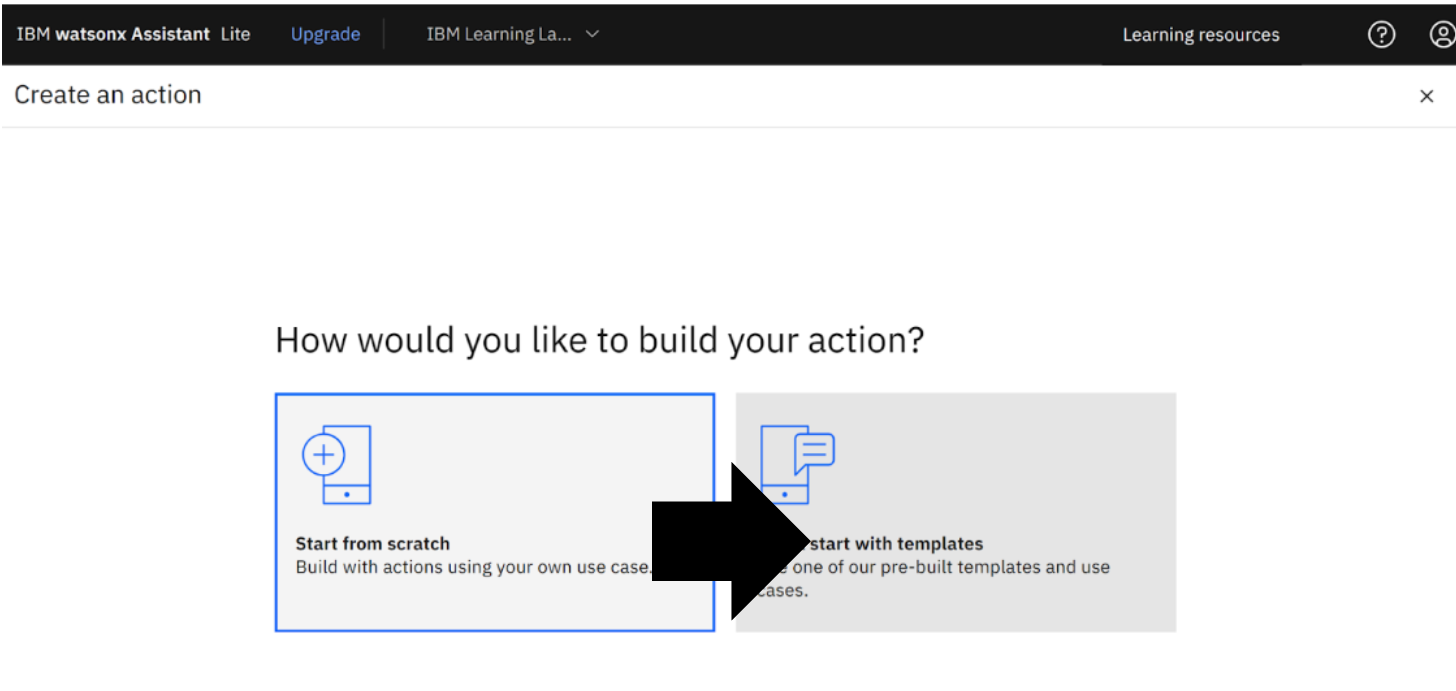
Create an Action
Select “Quick Start with Template".
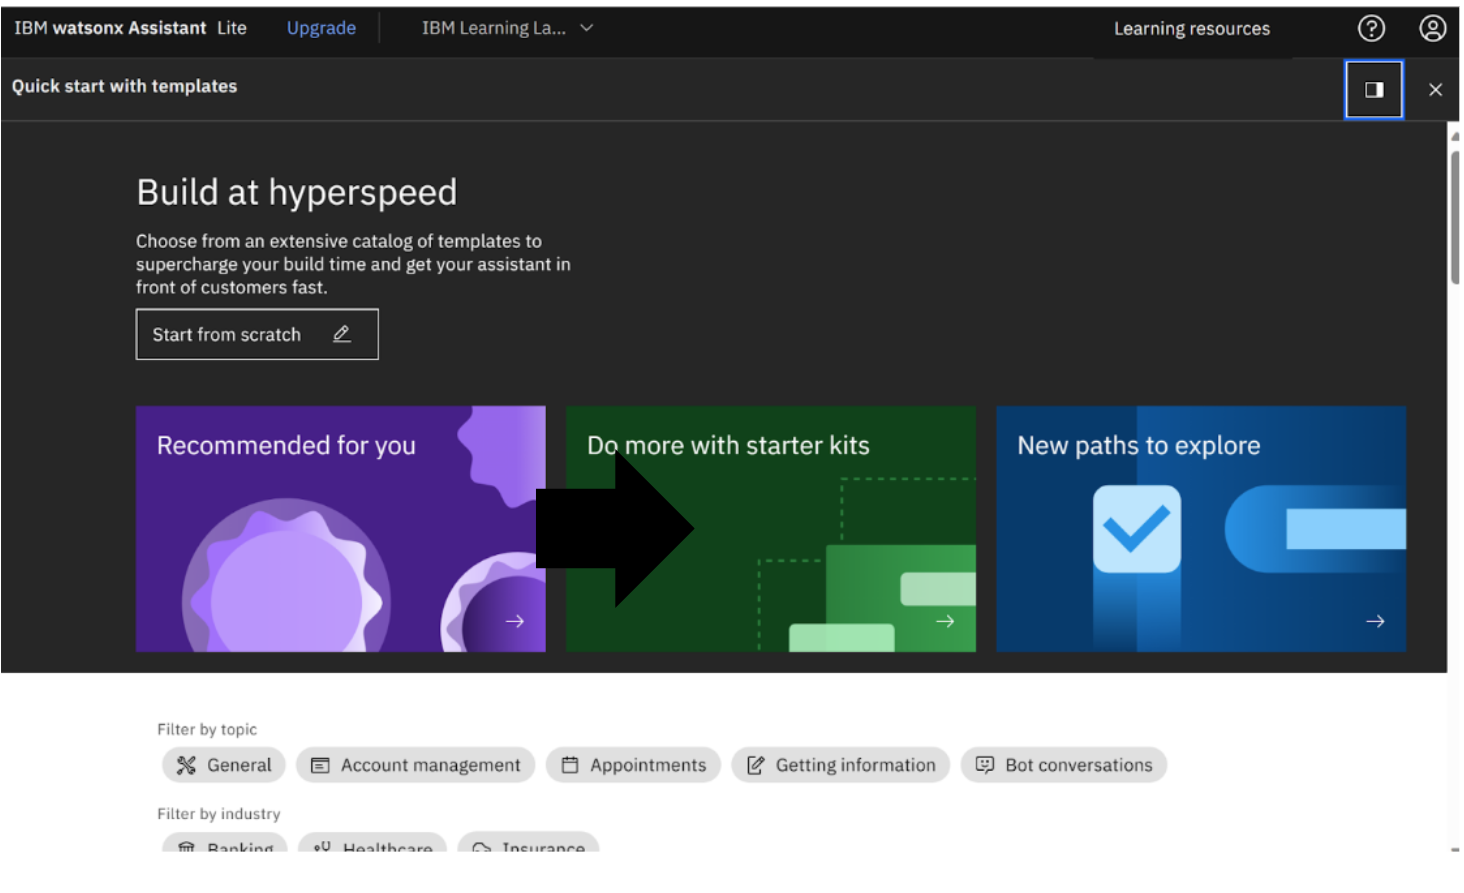
Build at Hyperspeed
Select “Do more with starter kits”.
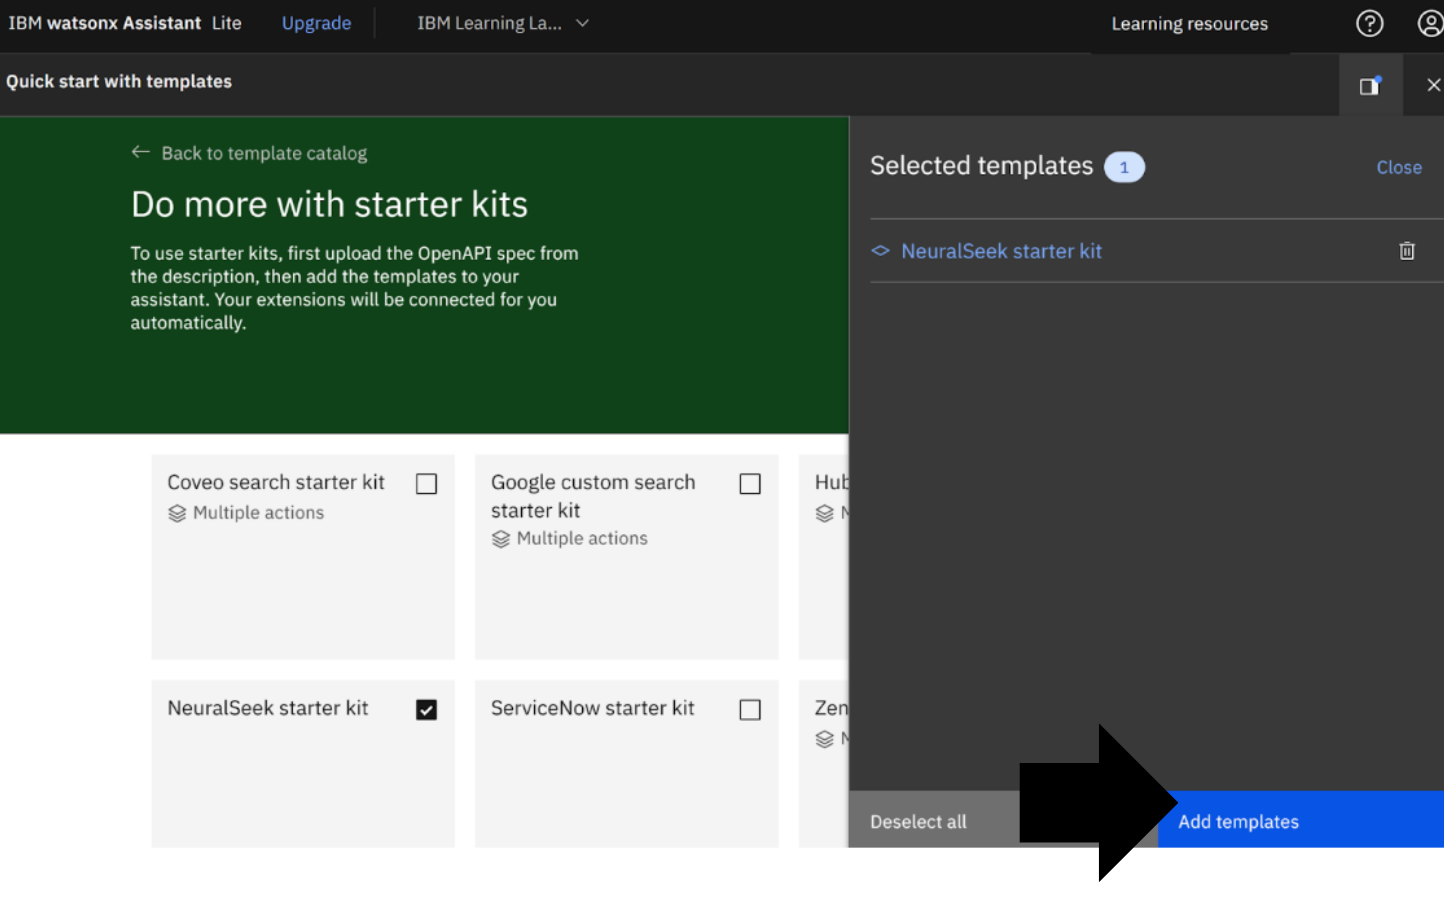
Quick Start with Templates
Search and select “NeuralSeek”.

NeuralSeek Starter Kit
Click “Select this starter kit”.

Selected Templates
Click “Add templates".
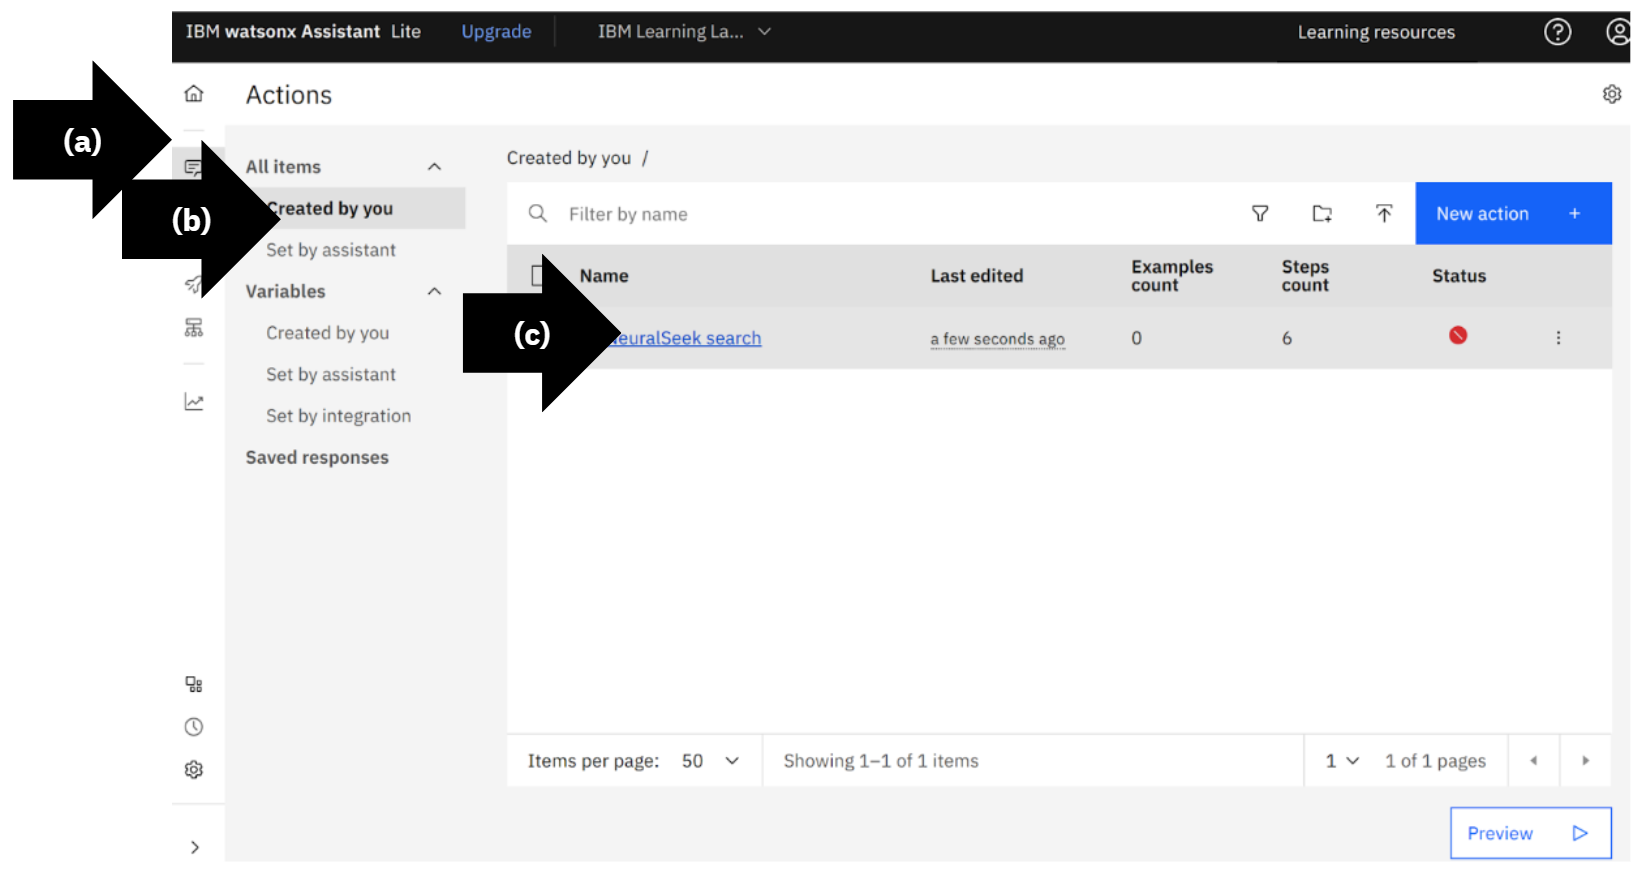
View Inactive Actions
- (a) On the left menu, select “Actions”.
- (b) Under All items, select “Created by you”. On the right side under status, view the red circle on “NeuralSeek search”. At this stage, the circle is red because the integrations are added, but not yet connected to the underlying extension.
- (c) Open the action, click “NeuralSeek search”.
Customer Starts With
On the left menu, select option 3 highlighted in red “This step has no content.”
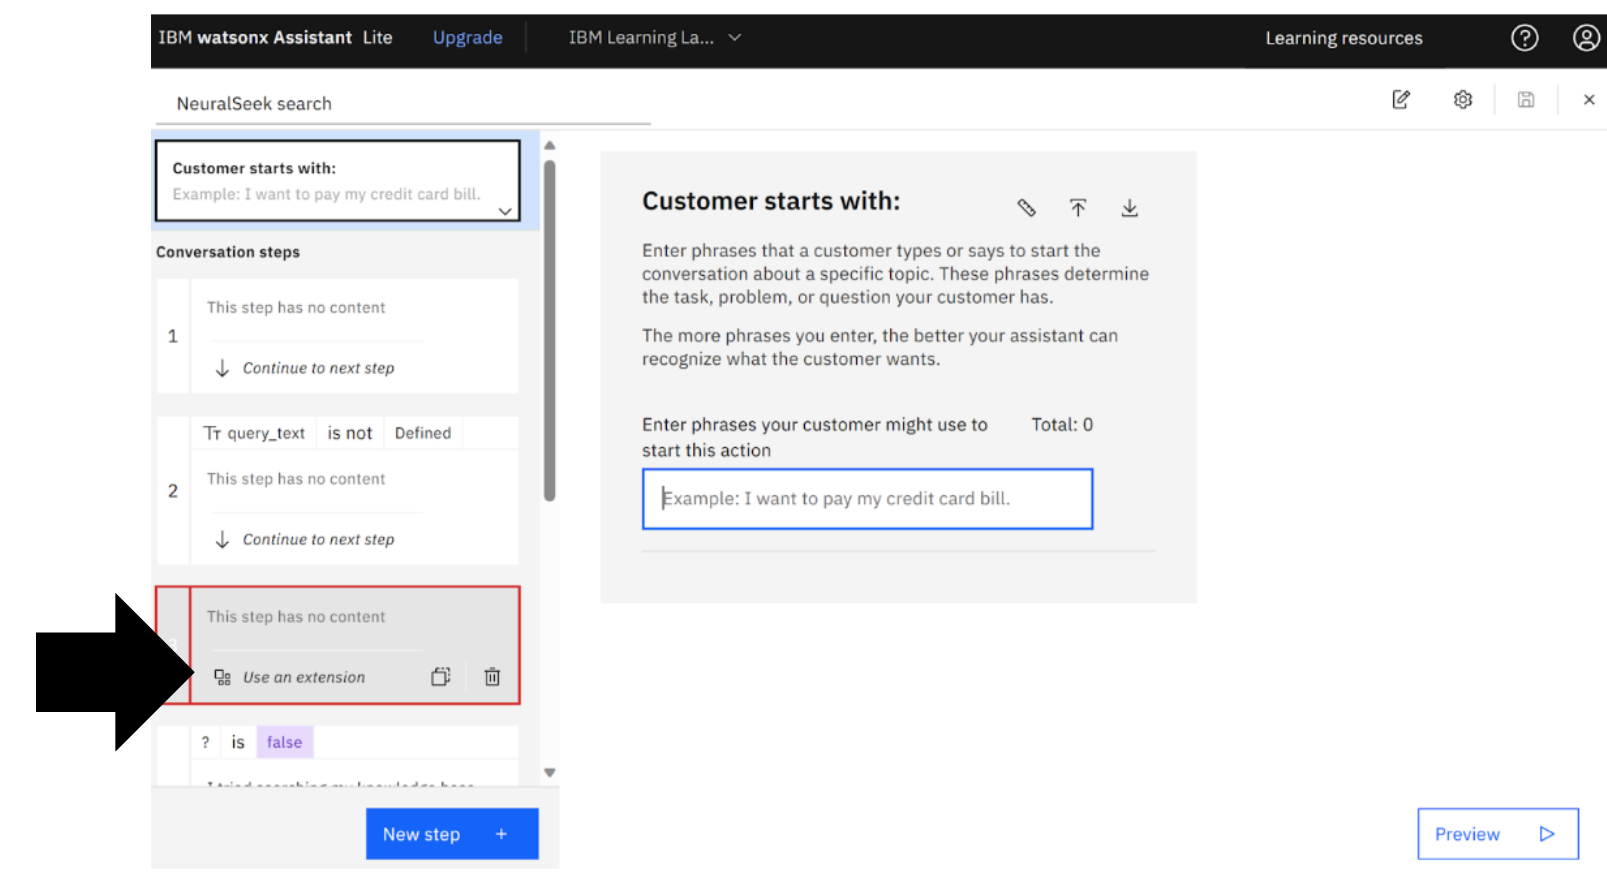
Delete Assignment
On the right side of the set “Query_Context to Context” click “X.” The reason why we are deleting it is because sometimes the query context provided by watsonx Assistant can be huge and exceeds the size of the request body to the API.

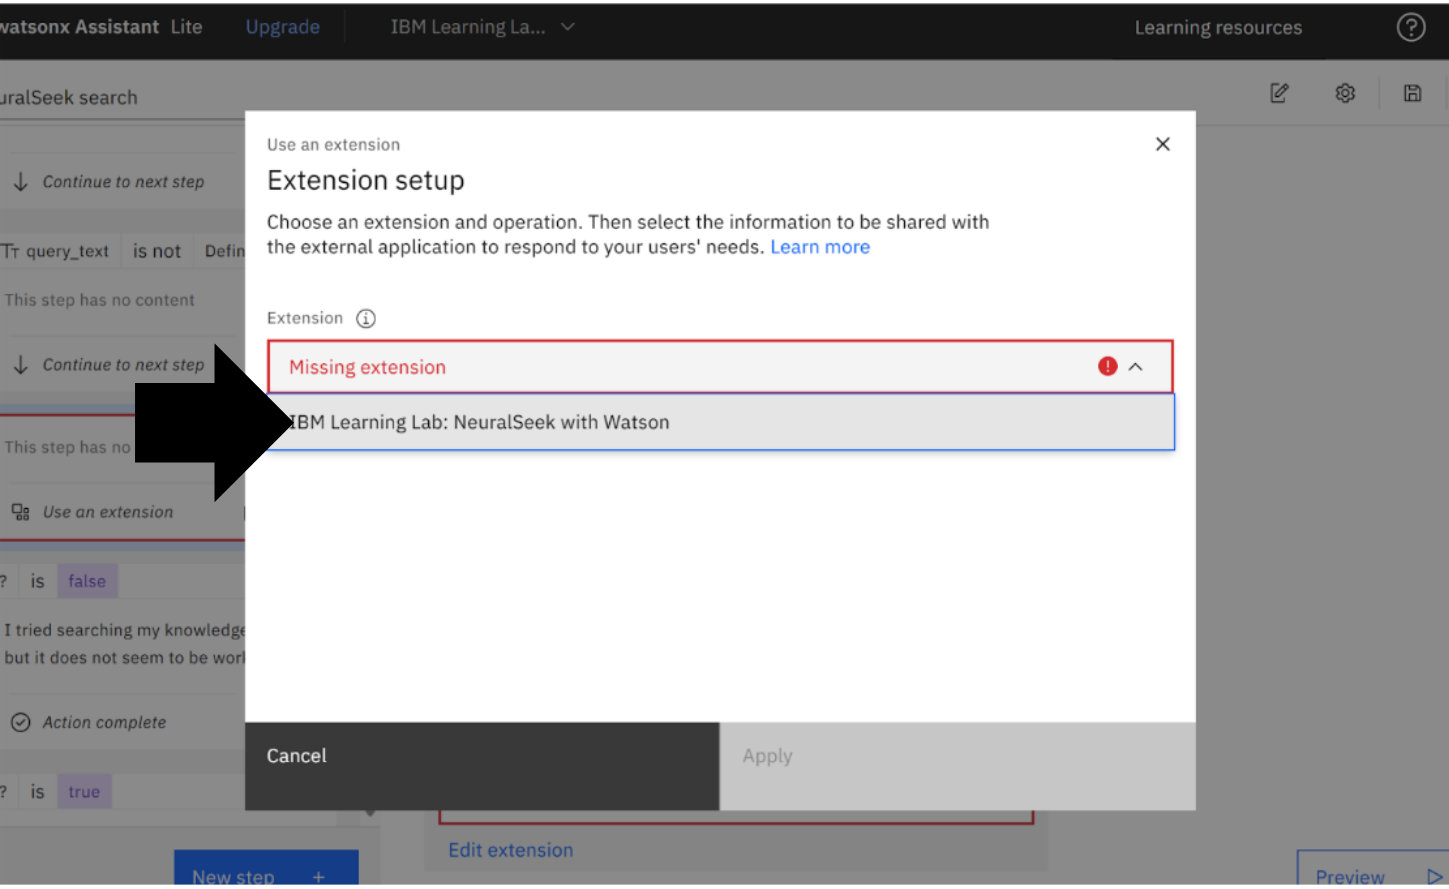
Edit Extension
Scroll down and click “Edit extension”.

Choose an Extension
Select NeuralSeek extension, in this example it is, “IBM Learning Lab: NeuralSeek with Watson”.
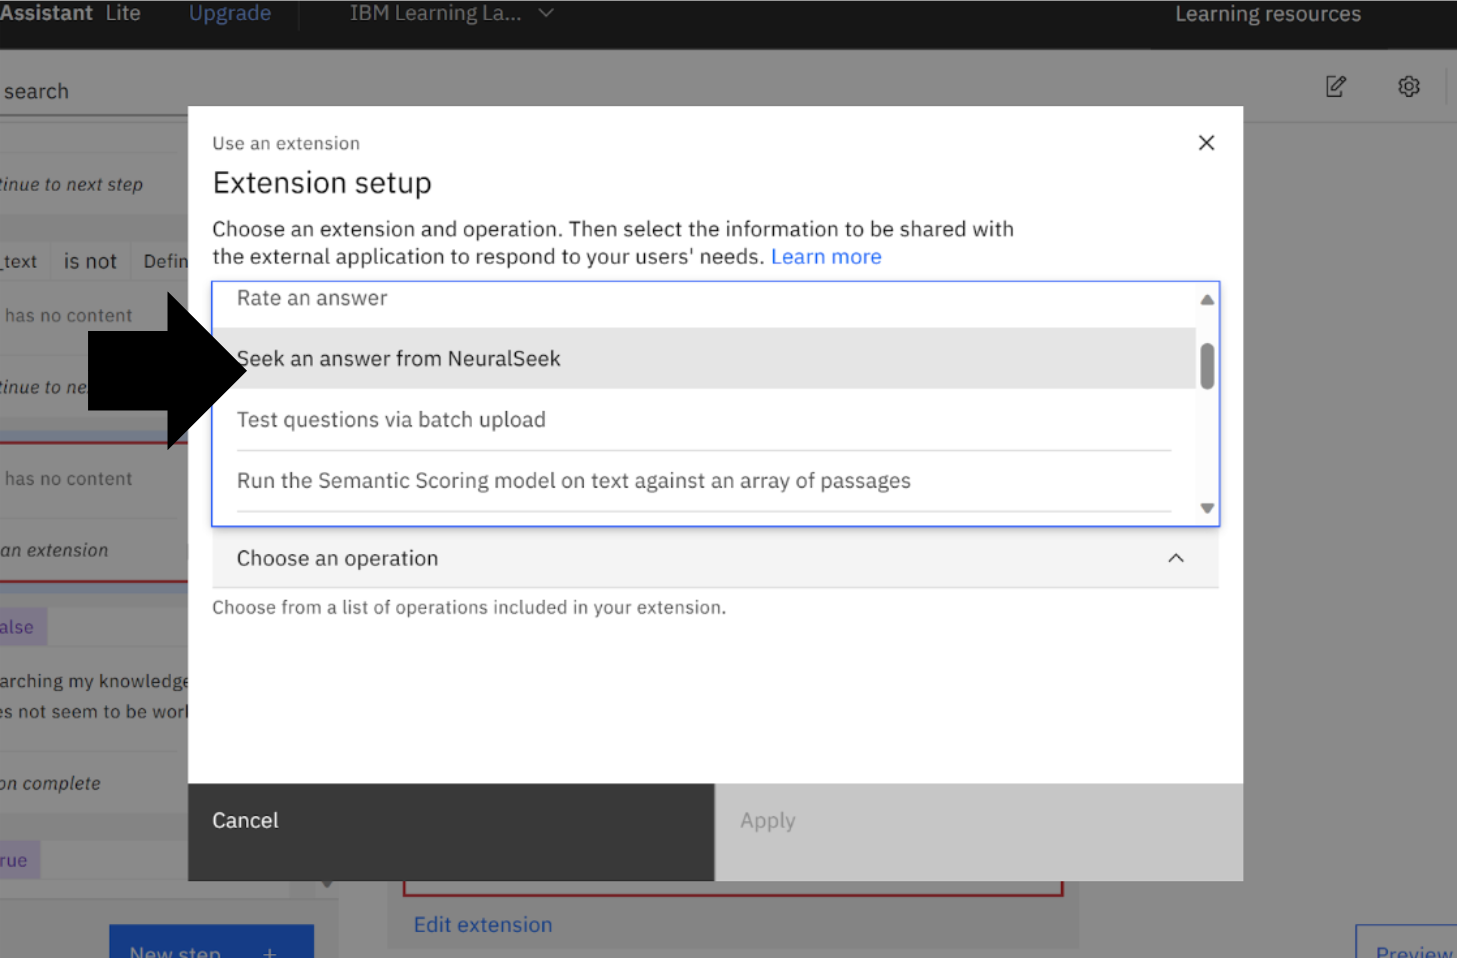
Choose Operation
Select “Seek an answer from NeuralSeek".
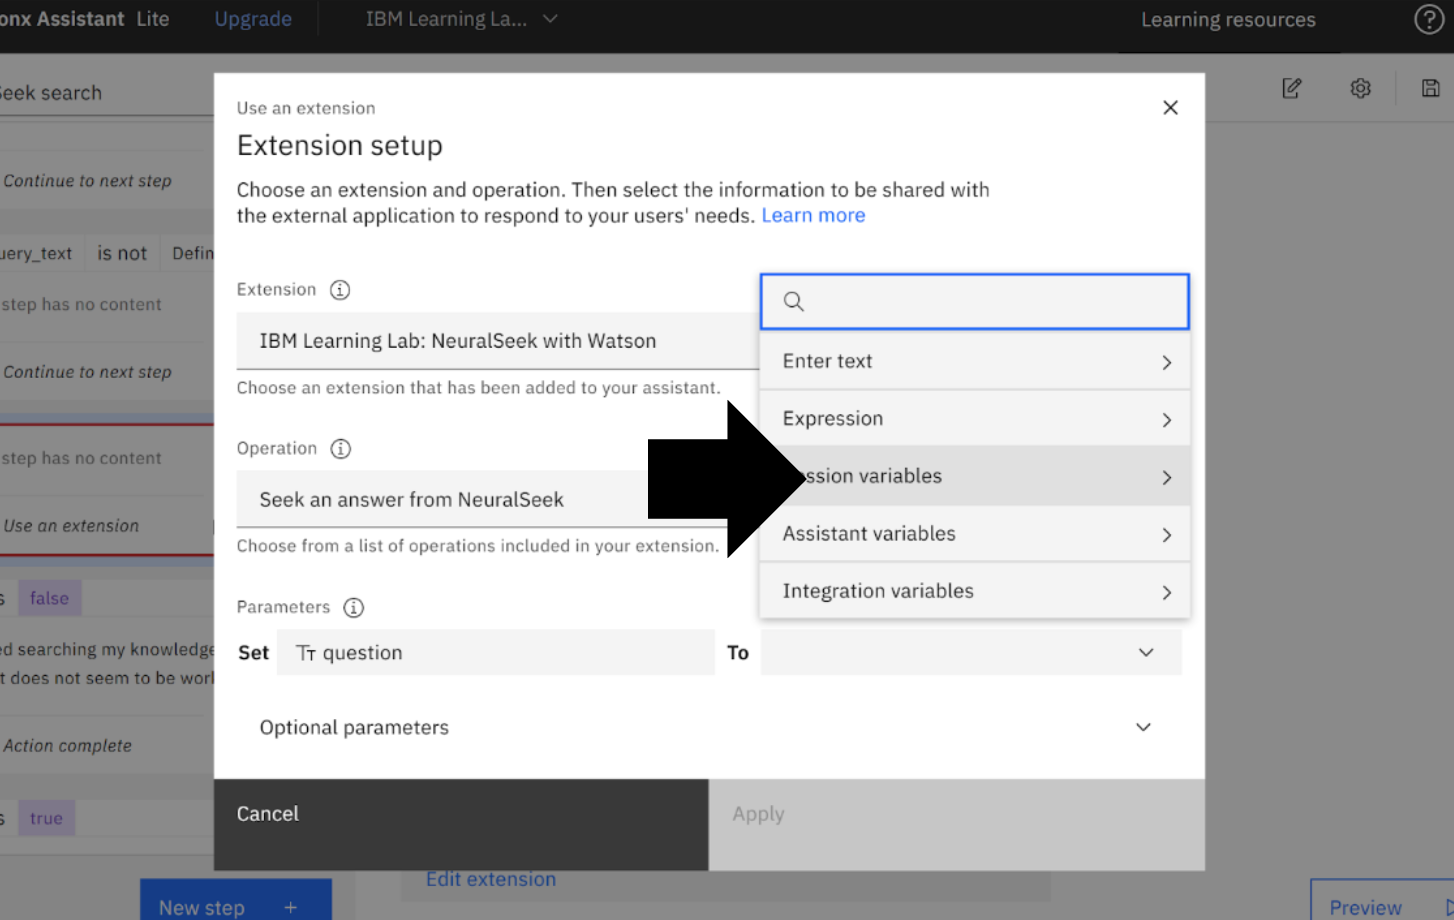
Set Extension Parameters
Select “Session Variables".
Choose Parameters
Select “query_text” from the list options.
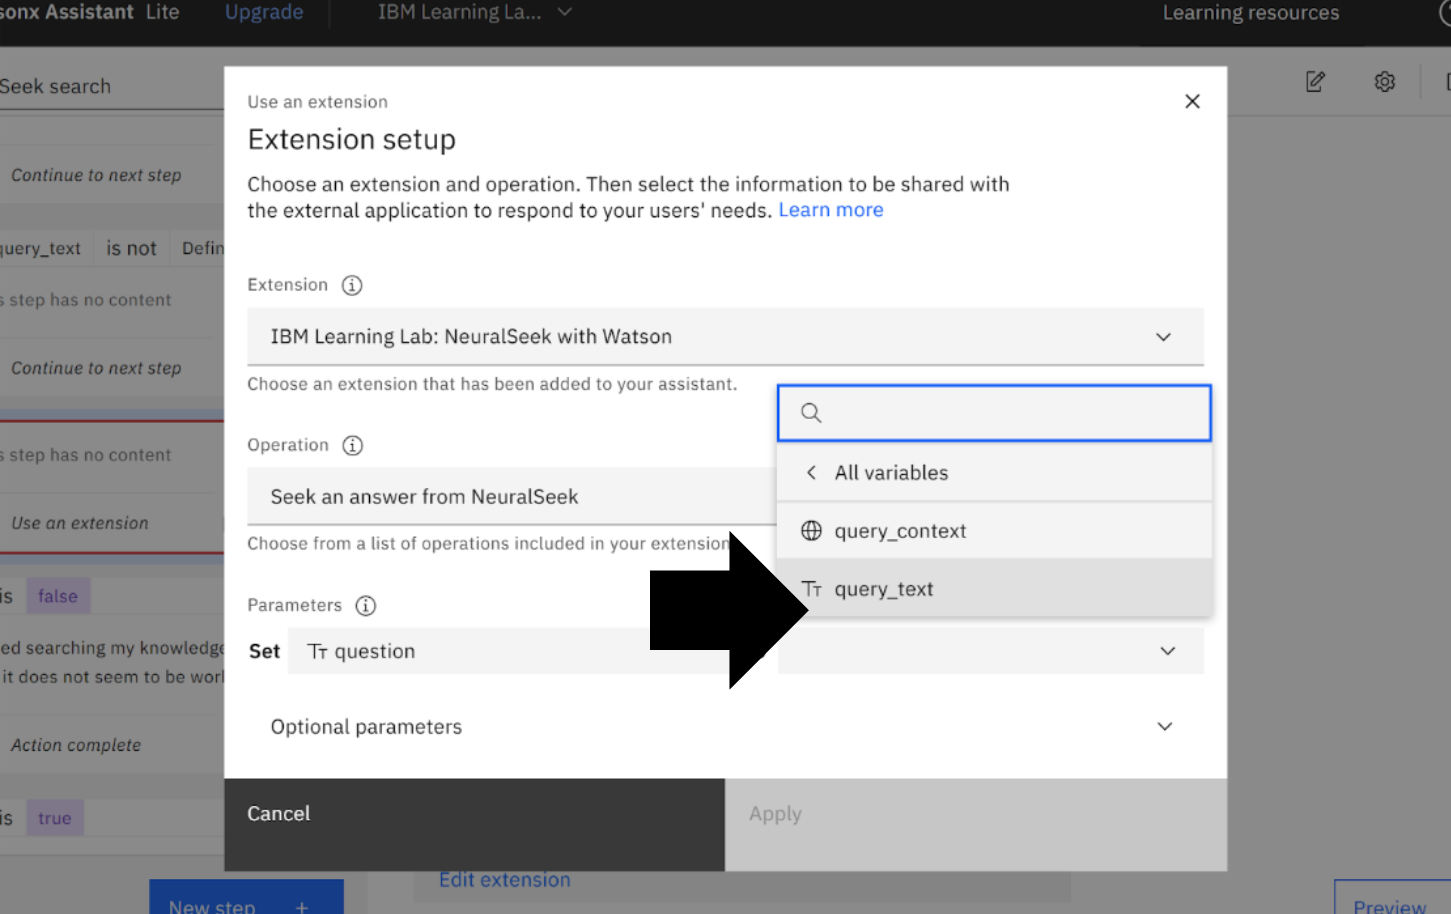
Extension Setup
Click “Apply".

Save Extension
In the top right corner, click the "Save" icon.
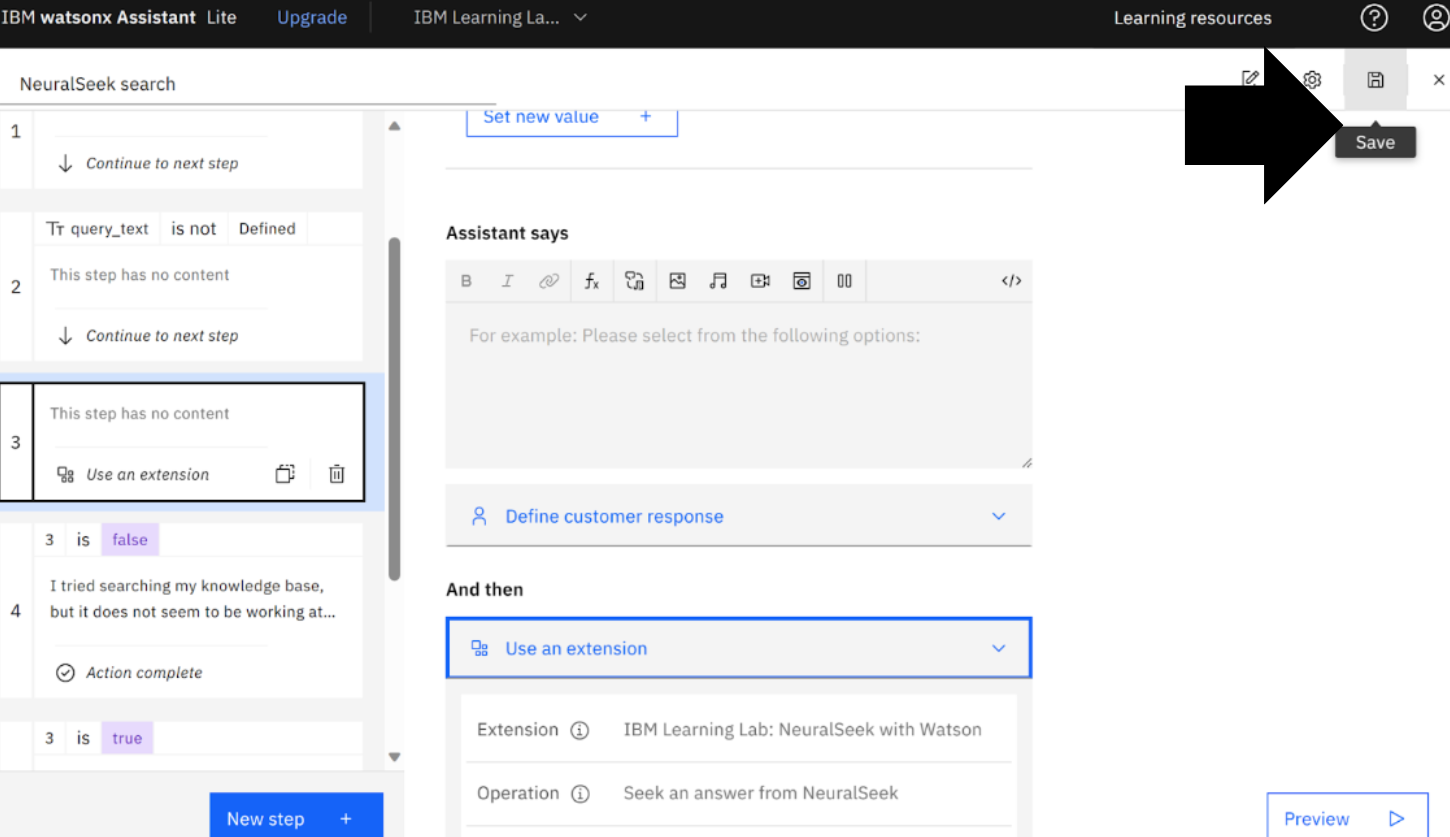
Close Extension
In the top right corner, click "x" to close.

Confirm Status
On the right side, view the green circle with a check mark next to NeuralSeek search. The circle is now green because the integrations are properly connected to the extension and ready to use.
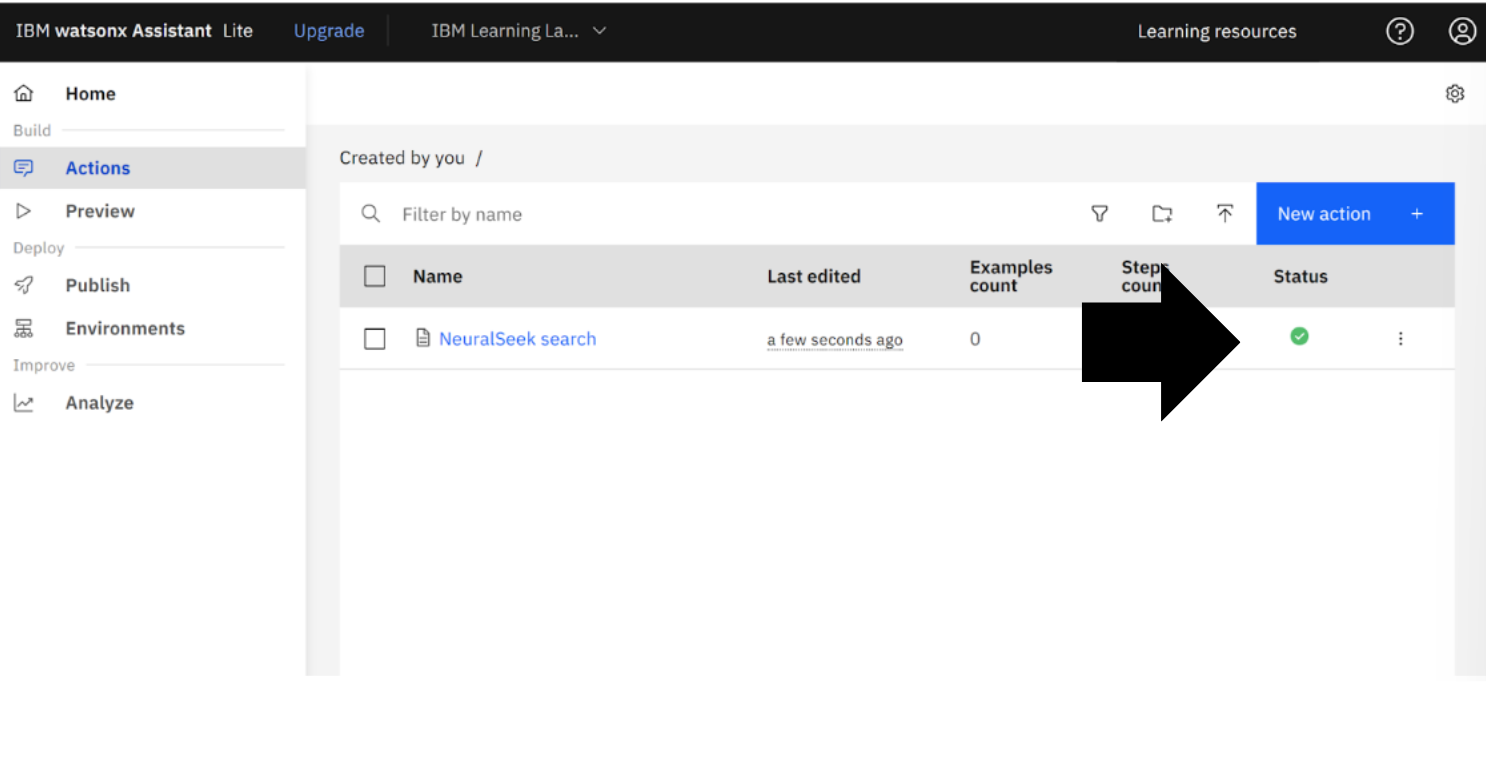
NeuralSeek with IBM watsonx Assistant starter kit integrations are now connected and ready for use.
Change Default to Generative AI Responses
Set up a NeuralSeek call action to use to have generative AI respond to all queries, even questions not listed in watsonx Assistant.
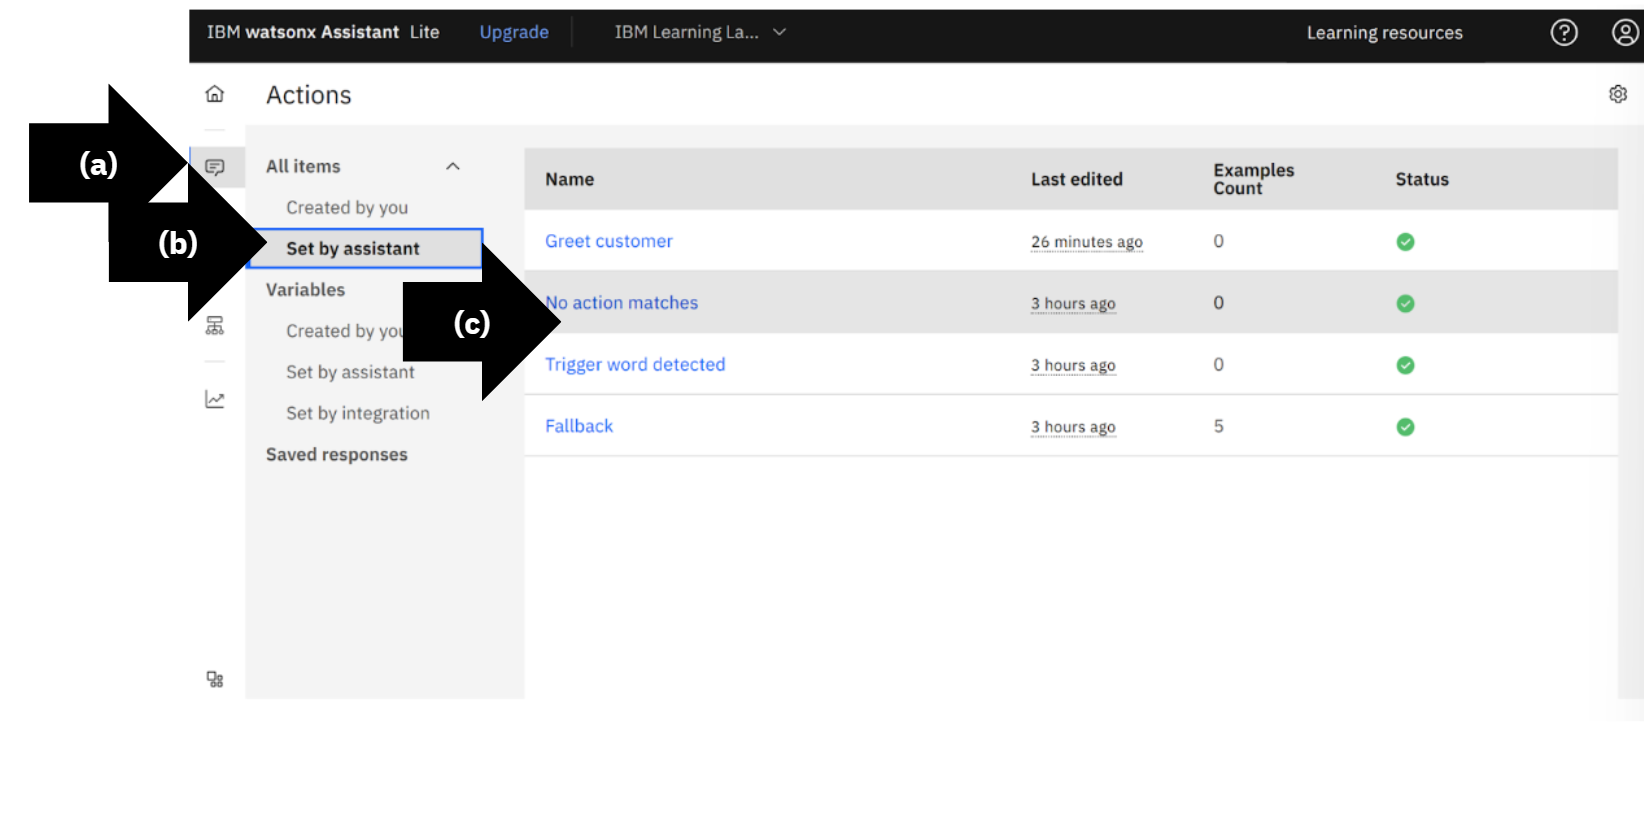
- (a) On the left menu, select “Actions”.
- (b) Under All items, select “Set by assistant”.
- (c) Select “No action matches”.
"No action matches" are cases when a user asks a question not listed in IBM Watsonx Assistant's predefined responses.
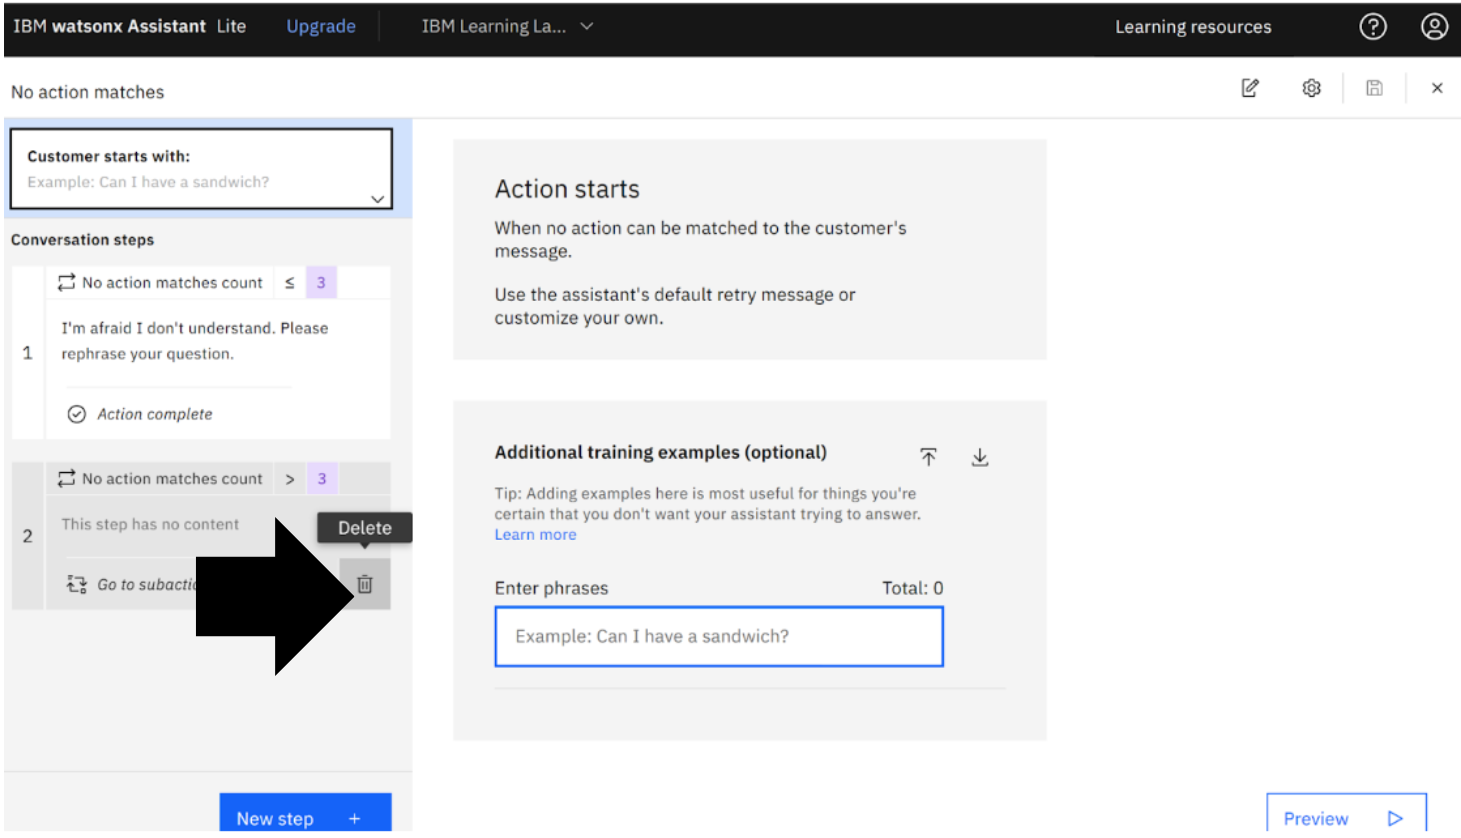
Delete 2 No Action Matches Count
On the left menu, on step 2, click the “Trashcan” icon.
Confirm Delete
Click “Delete”. Wait for the system to train.

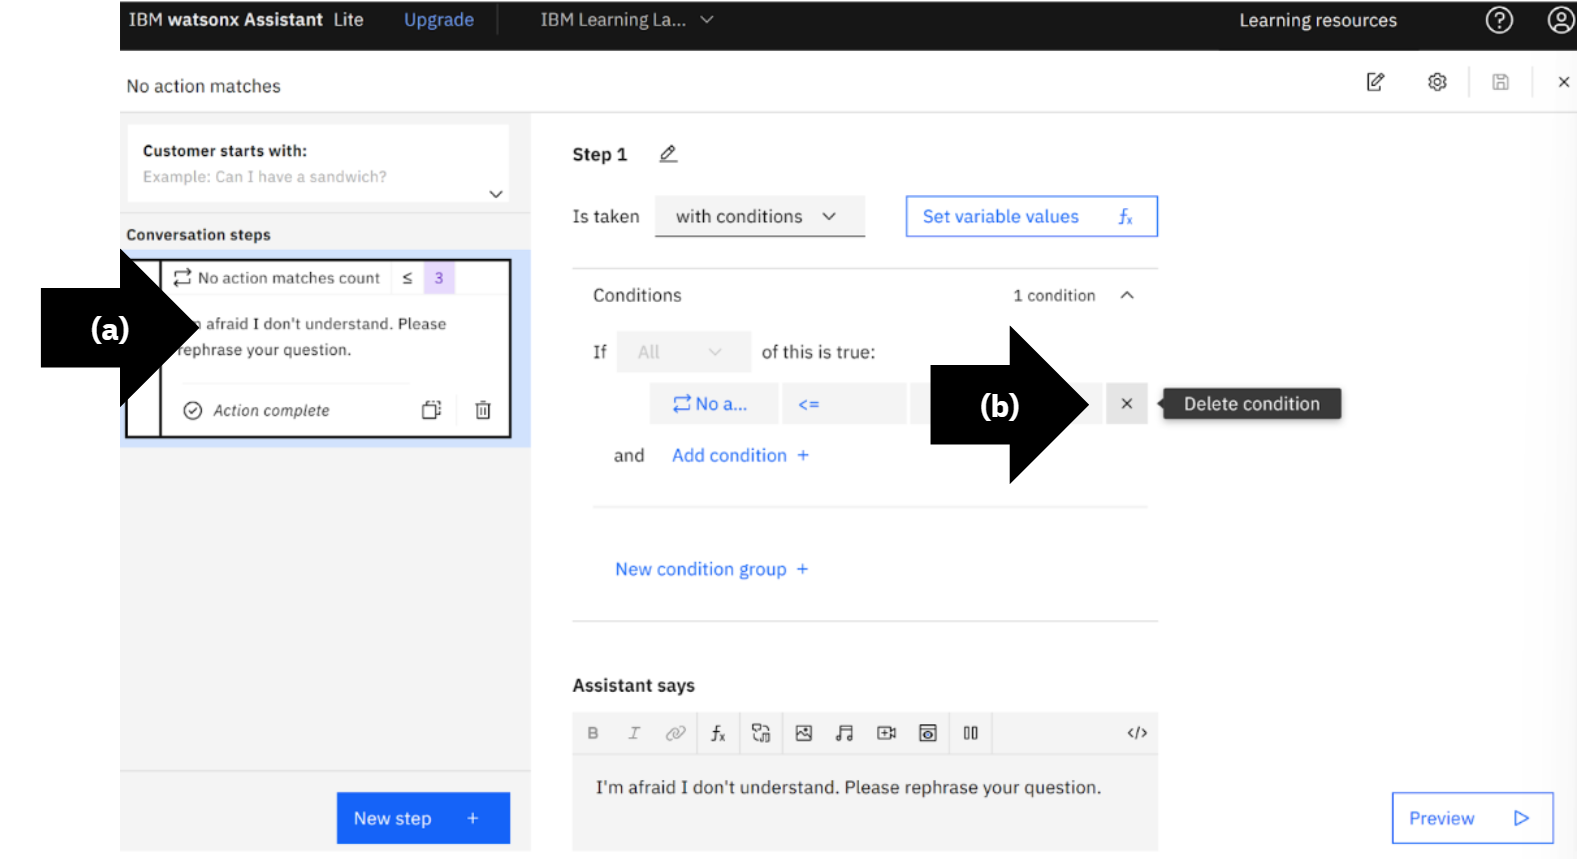
Delete Conditions
- (a) On the left menu, click 1.
- (b) Delete the condition, click the “x”.
Open Preview
Click “Preview”.

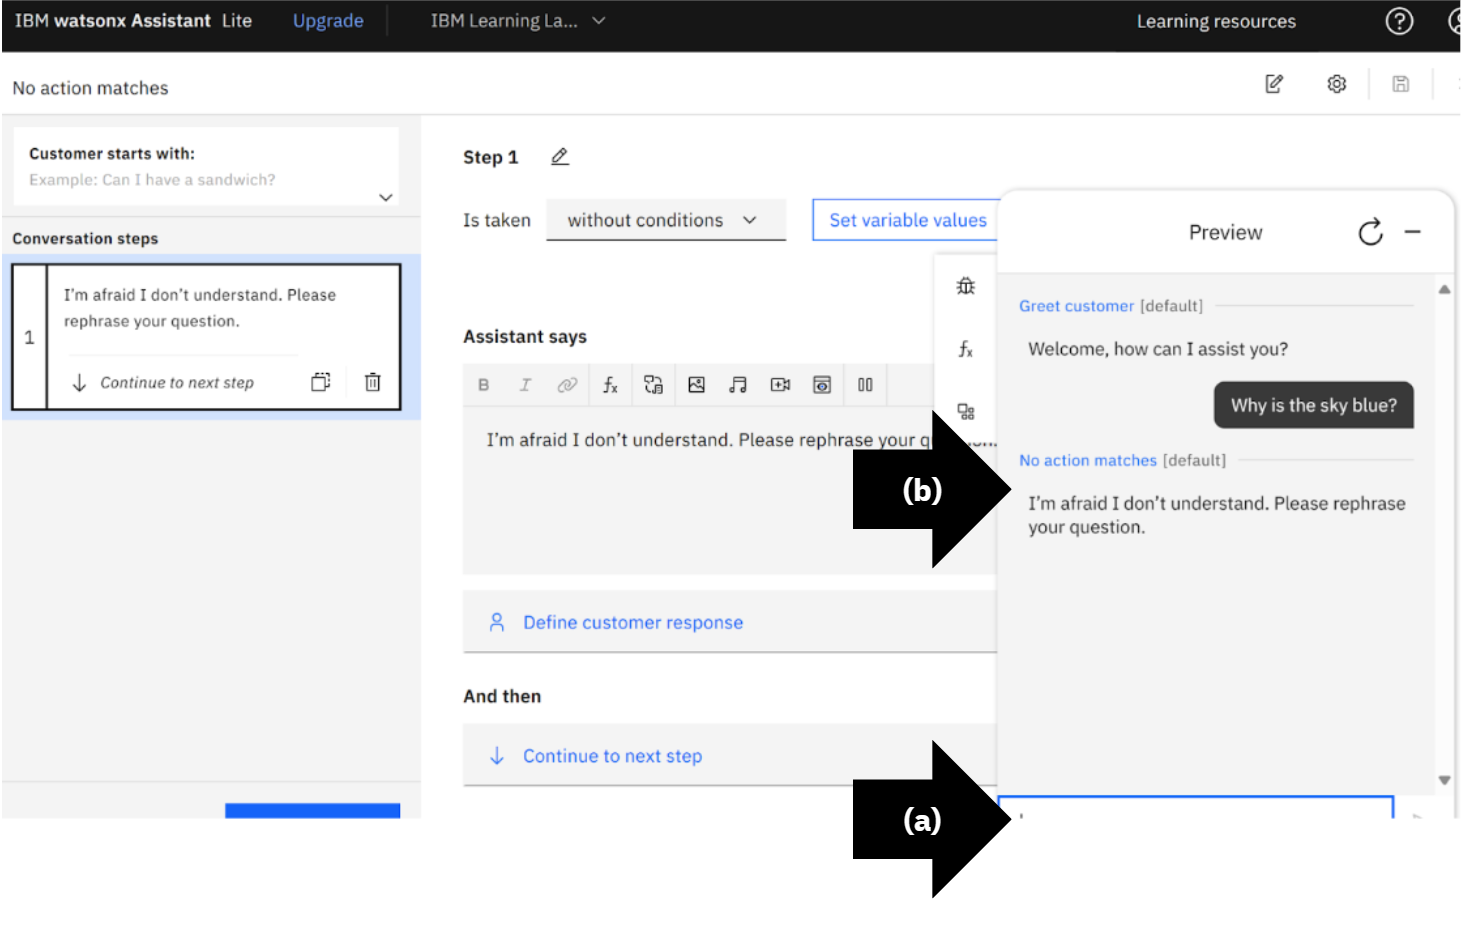
View Default Responses Before Setting Up NeuralSeek Call
- (a) Type a random question, in this example it is, “Why is the sky blue?”
- (b) Press “Enter”.
View the watsonx Assistant’s default response, “I’m afraid I don’t understand. Please rephrase your question.” This is to test that the fallback action is being triggered properly.
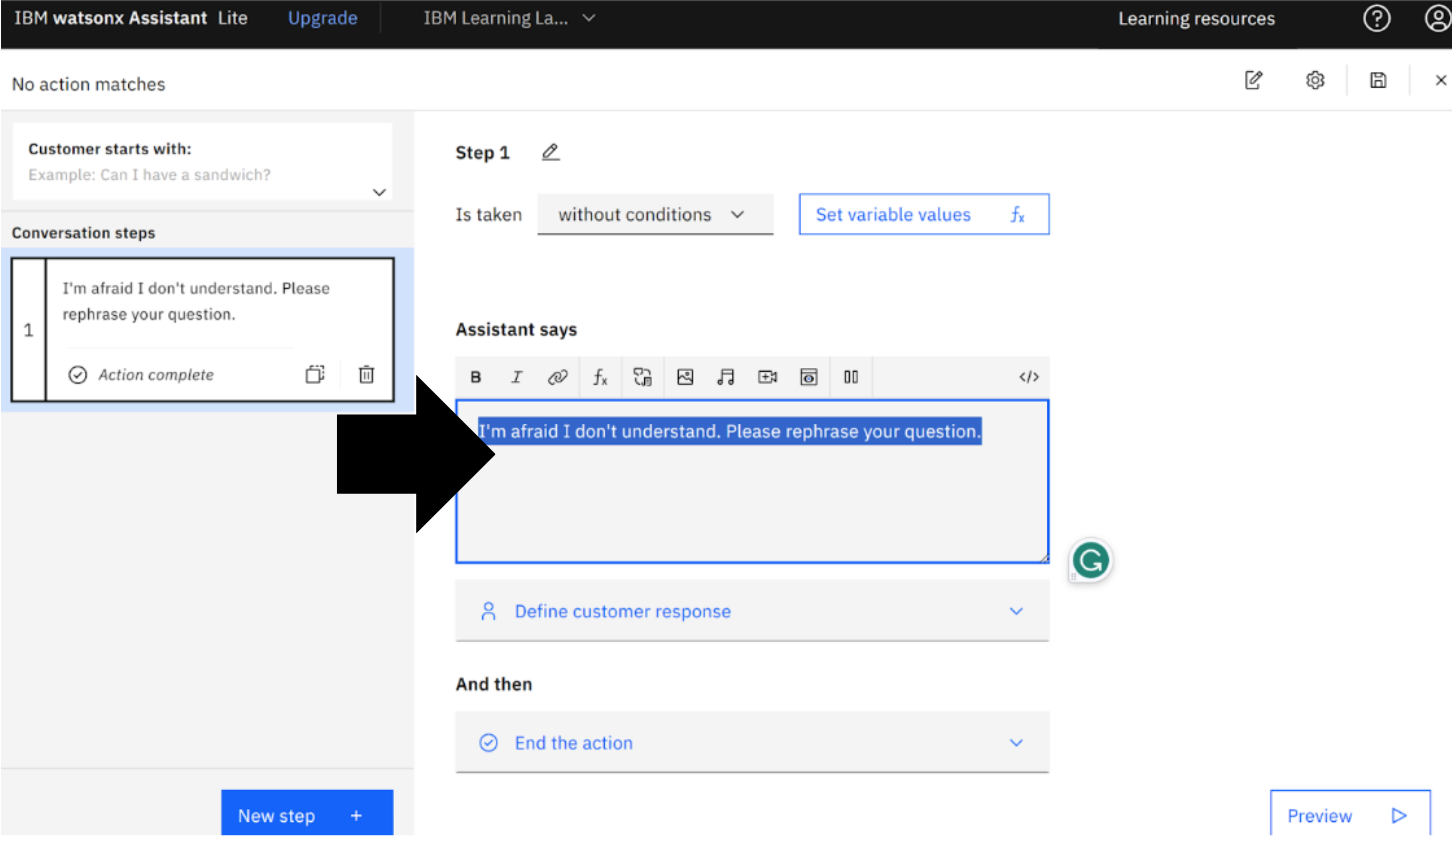
Delete Default Response
In the assistant text box, delete “I’m afraid I don’t understand. Please rephrase your question.”.
Add Subaction
- (a) Scroll to “And then”, click “End the action”.
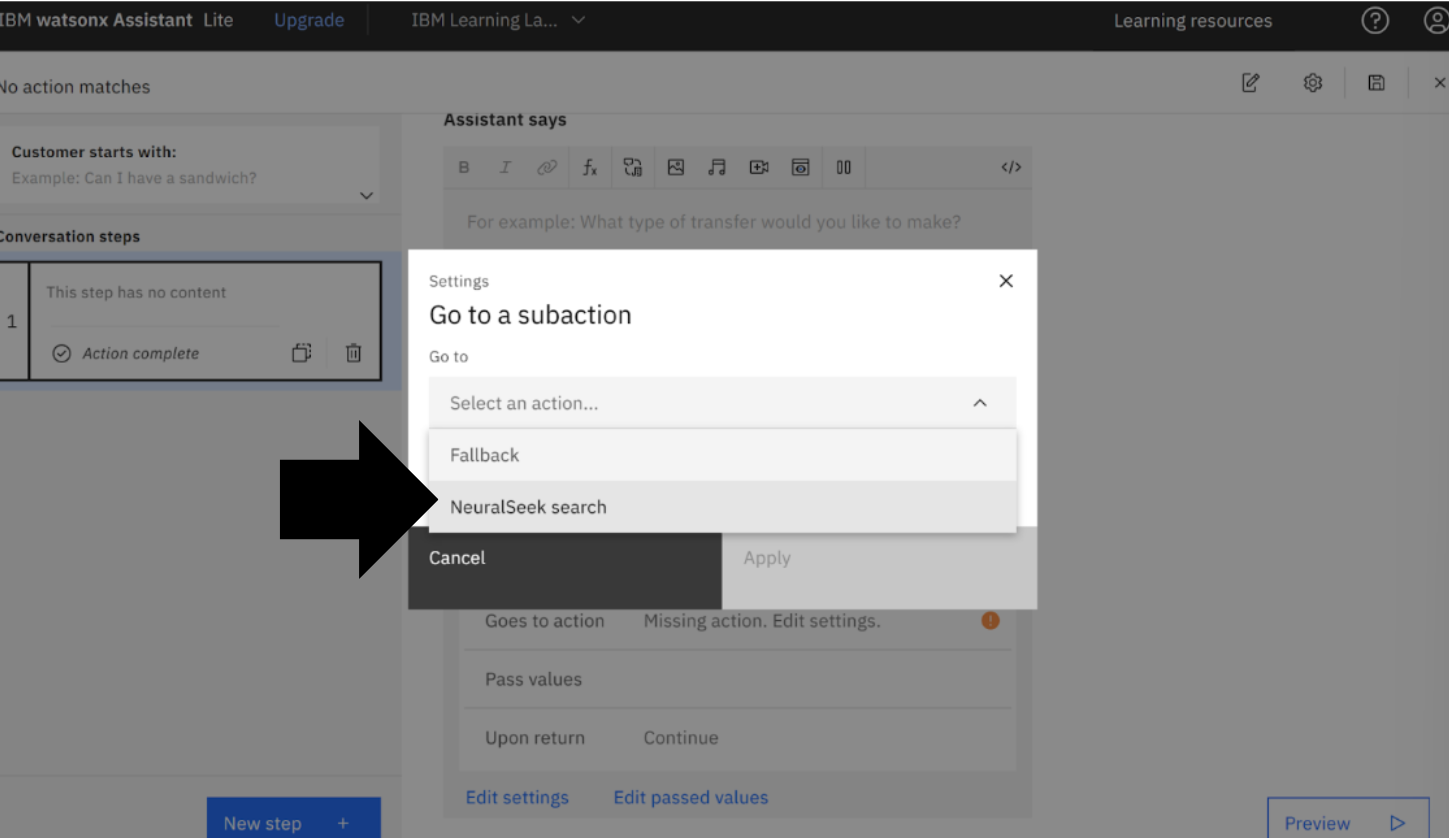
- (b) Select “Go to a subaction”.

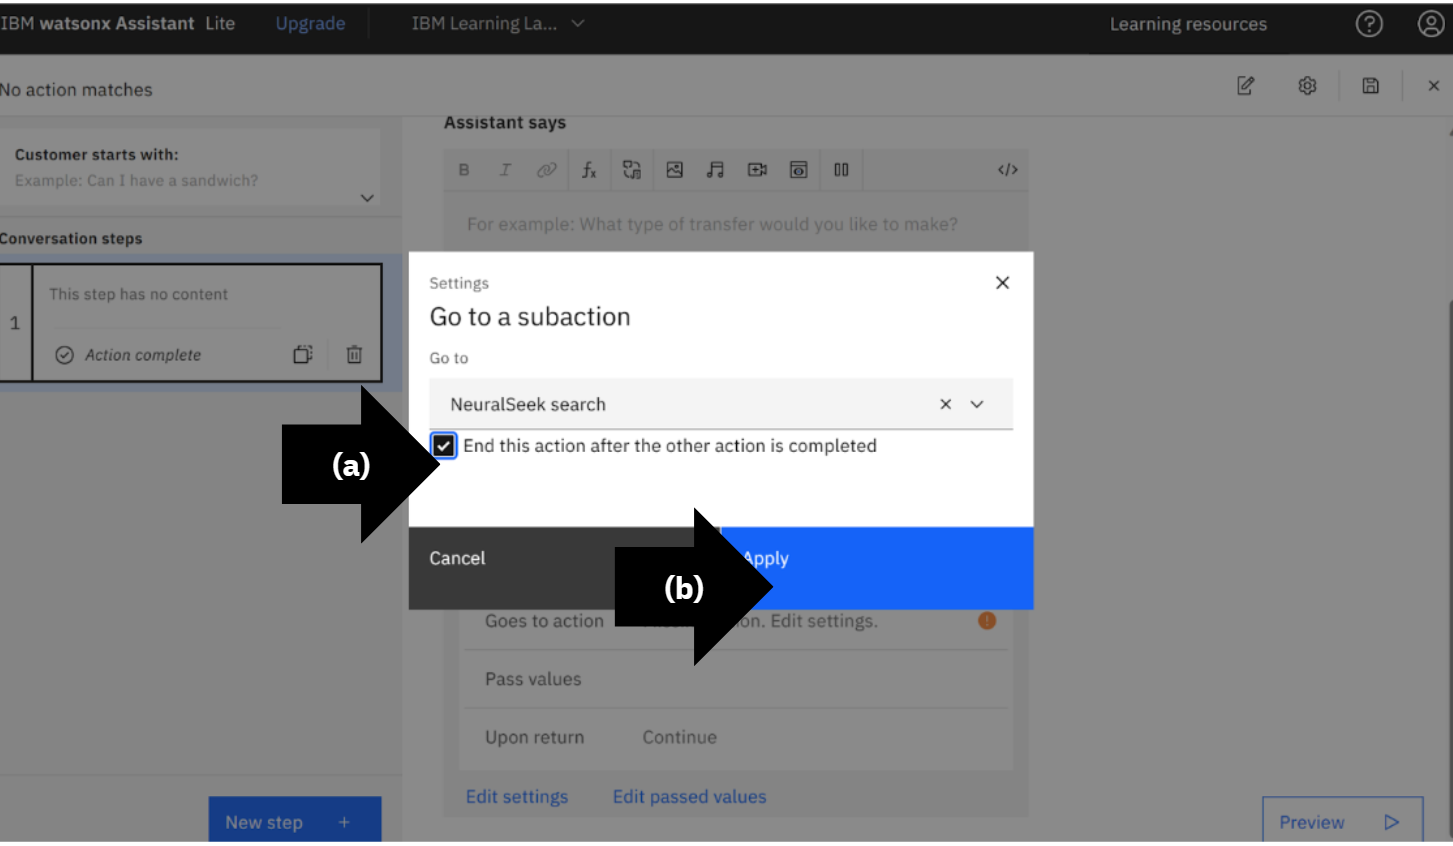
Go to a Subaction
Select “NeuralSeek search".
Check Action
- (a) Check “End this action after the other action is completed”.
- (b) Click “Apply”.
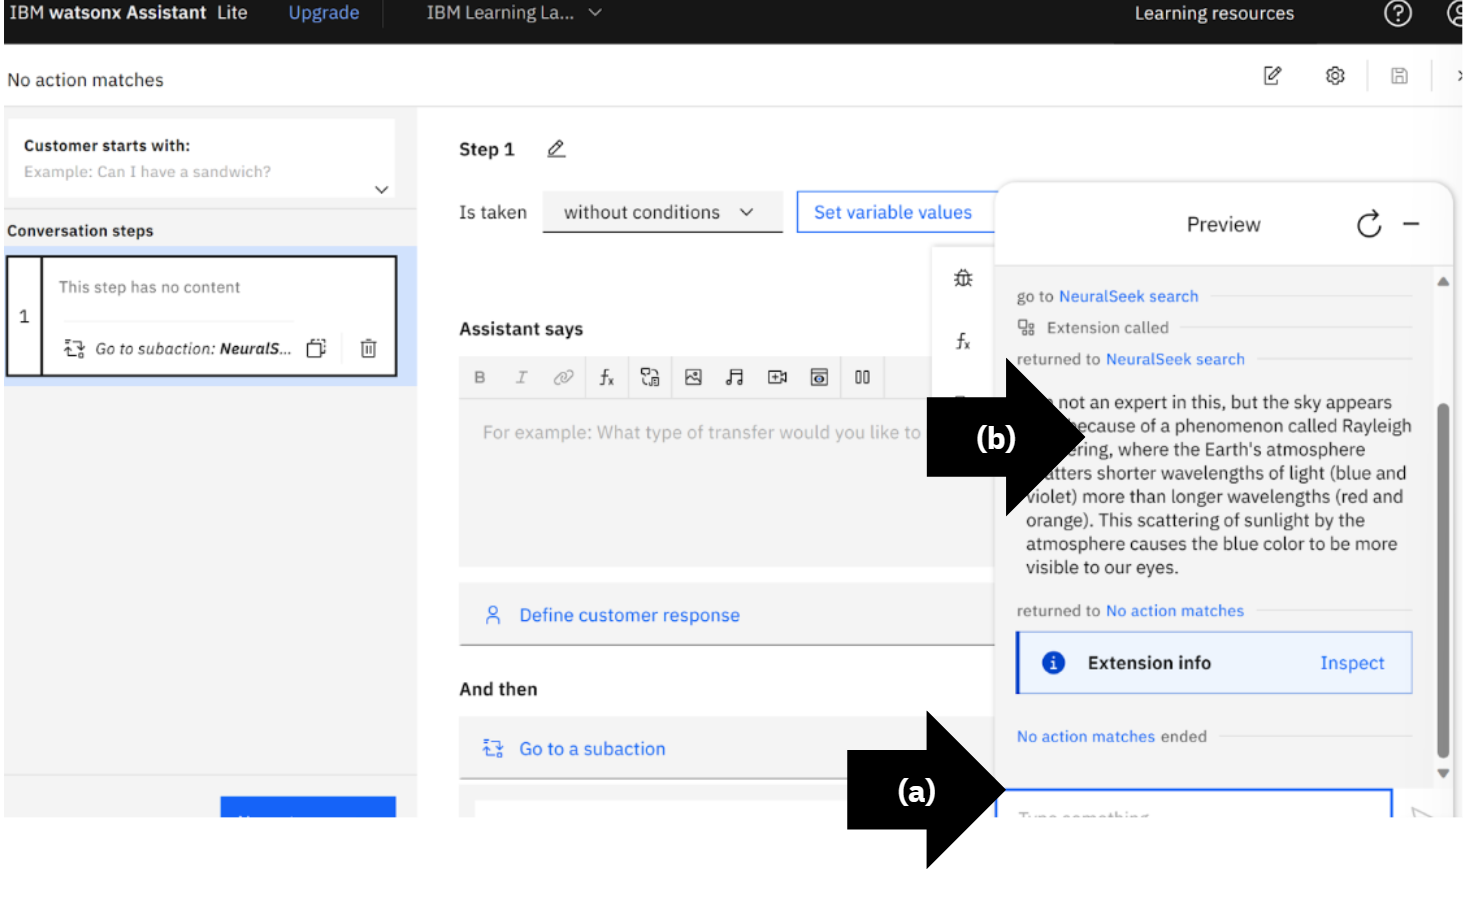
Preview NeuralSeek Generative AI Response
- (a) In the lower right, click “Preview” and type a random question, in this example it is, “Why is the sky blue?”
- (b) Press “Enter”.
View the NeuralSeek generative AI response.
A NeuralSeek call action that allows for generative AI responses to all queries is now set up, tested, and ready to use.