2.4 - KnowledgeBase Tuning
NeuralSeek offers several ways to improve generated answers from your connected KnowledgeBase. Within the Configure tab of NeuralSeek, you can adjust different parameters best suited for your use case to improve low quality responses. For more information on best KB tuning practices, check out our KnowledgeBase Tuning Guide in our documentation.
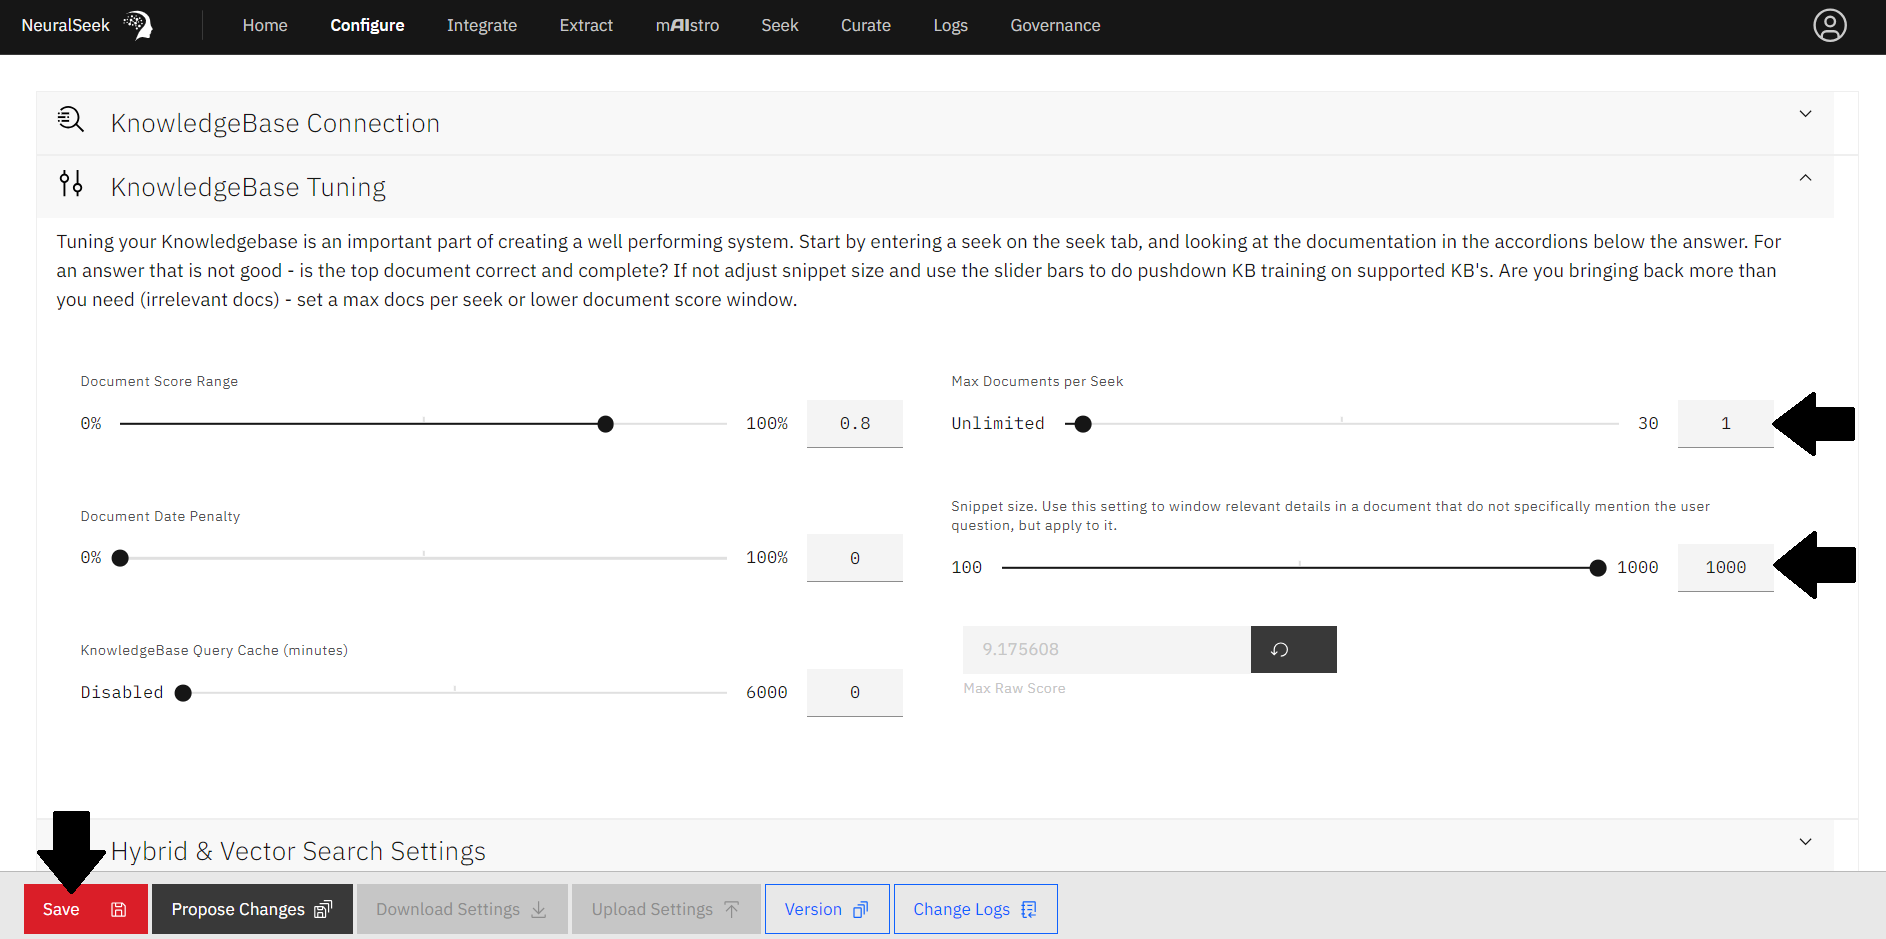
Reducing Max Docs, Increasing Snippet Size
The Max Documents per Seek option sets the number of documents to send to the LLM on each Seek action. The Snippet Size option sets the character count to pass to the KB for document passage size. The larger the number, the bigger the documentation chunk.
Let's play around with these settings and review how our generated answers are affected.
- Navigate to the
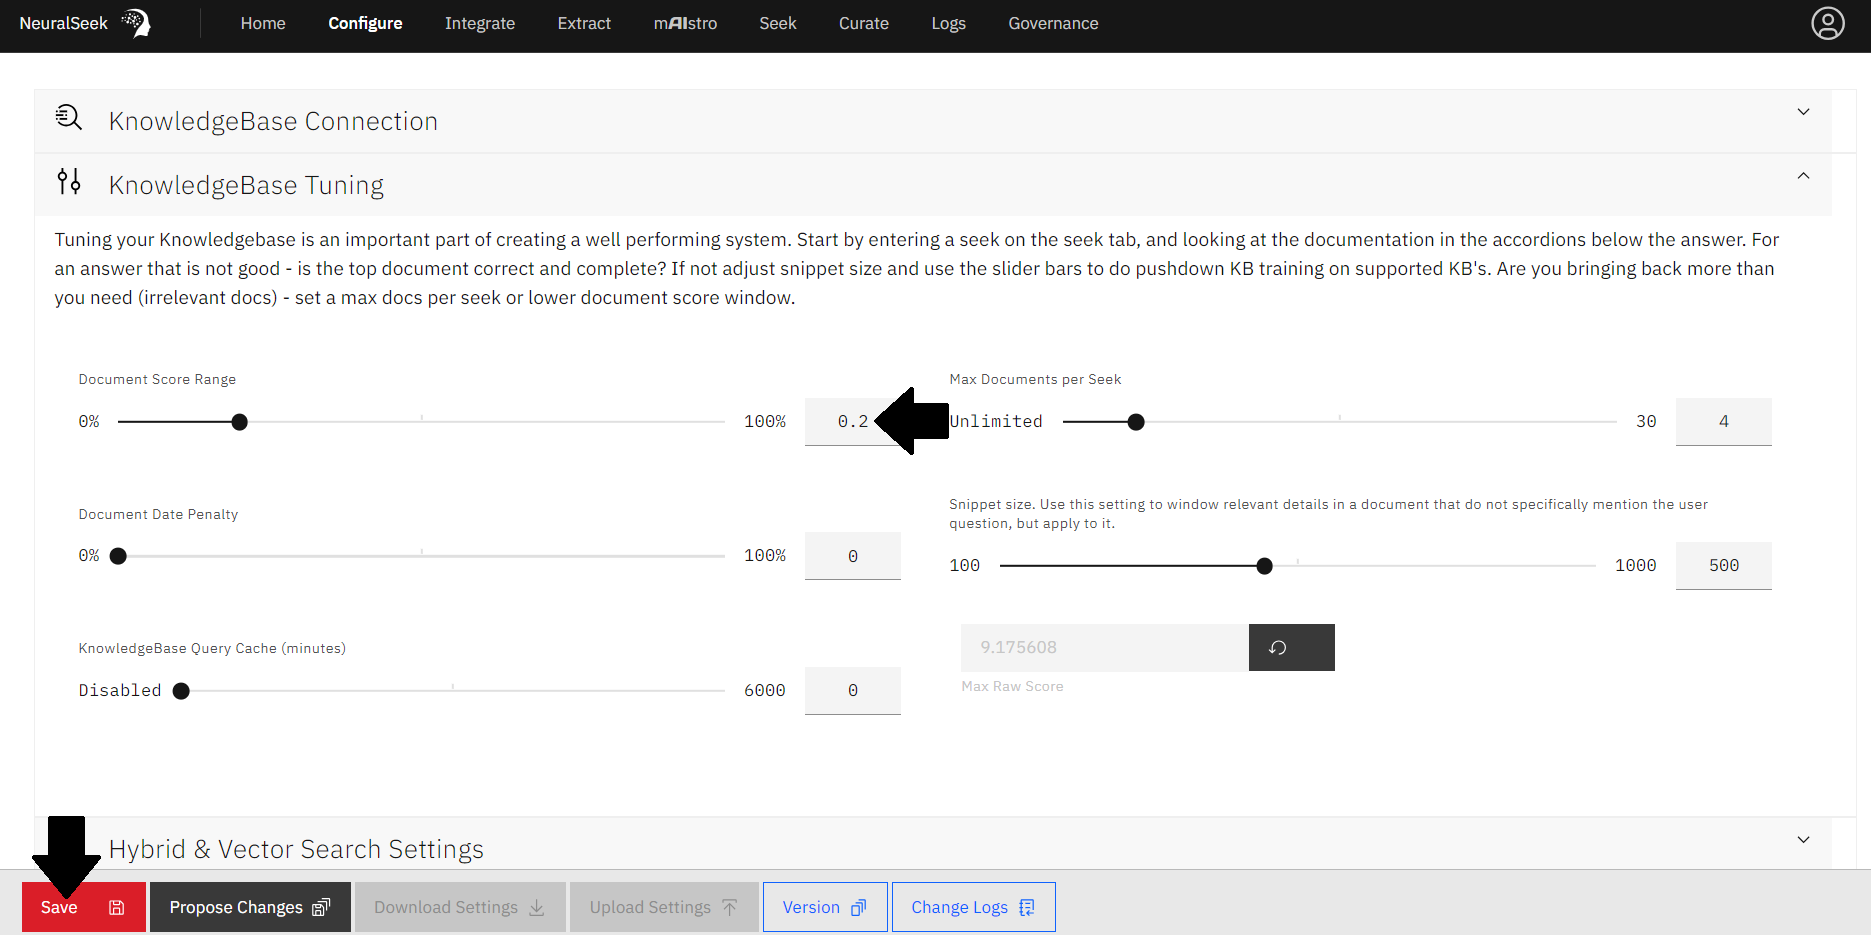
Configuretab in NeuralSeek. - Expand the KnowledgeBase Tuning accordion.
- Use the sliding scale to set the
Max Documents per Seekto 1. - Use the sliding scale to set the
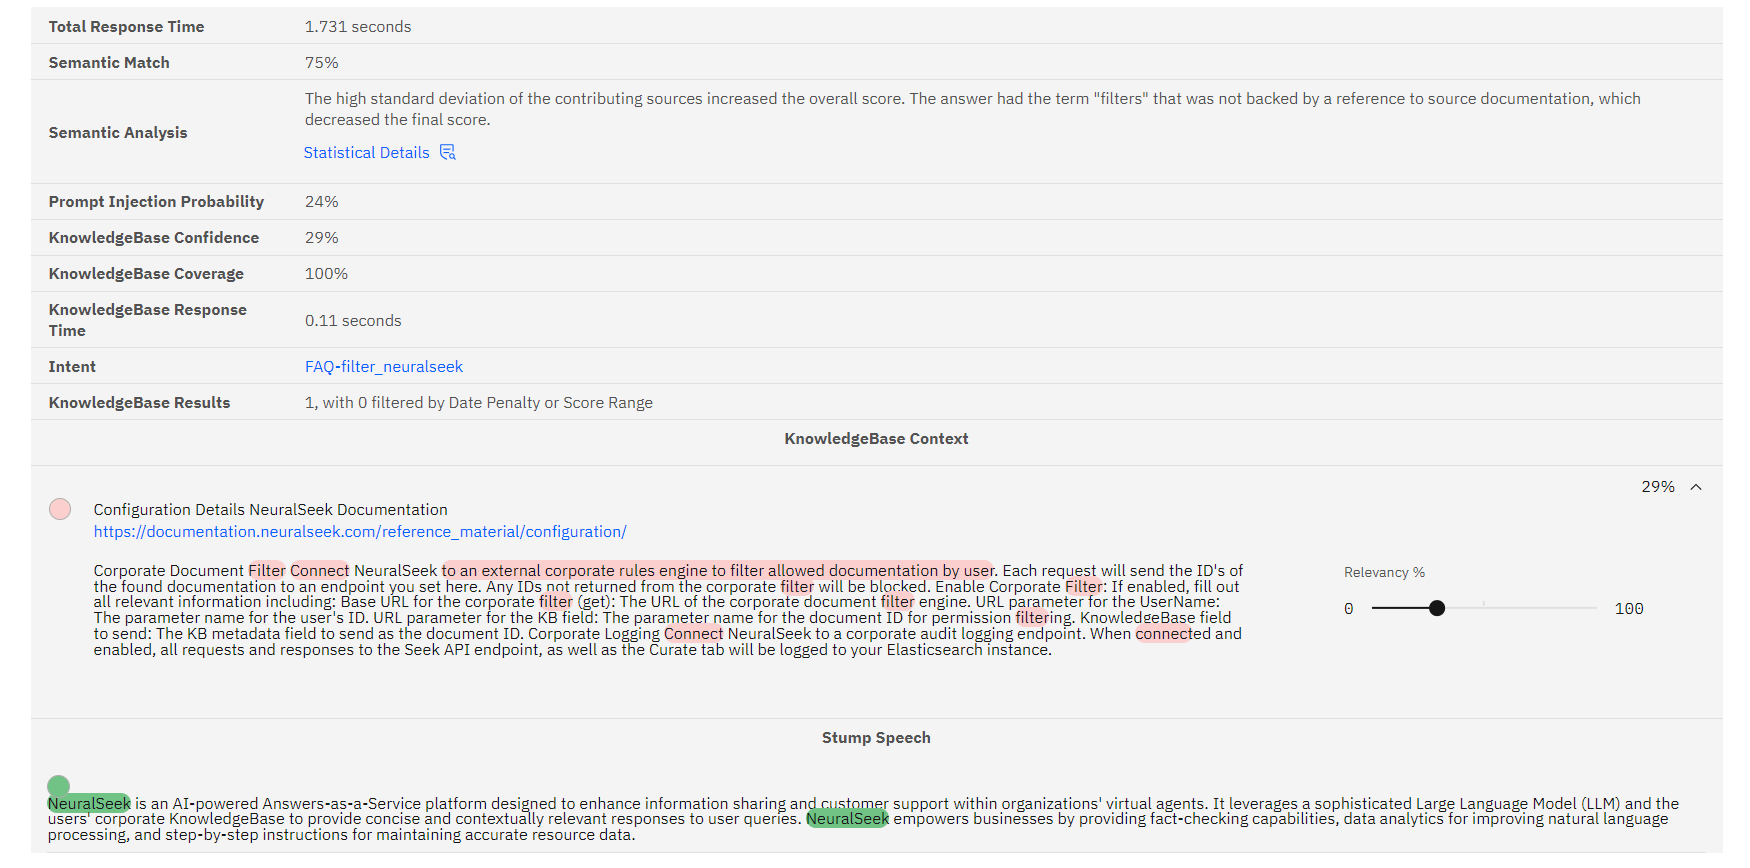
Snippet Sizeto 1000. - Click the red Save button to save your setting changes.
- Navigate to the
Seektab within NeuralSeek. - Query
"How does NeuralSeek filter?" - View the output below.
Increasing Max Docs, Reducing Snippet Size
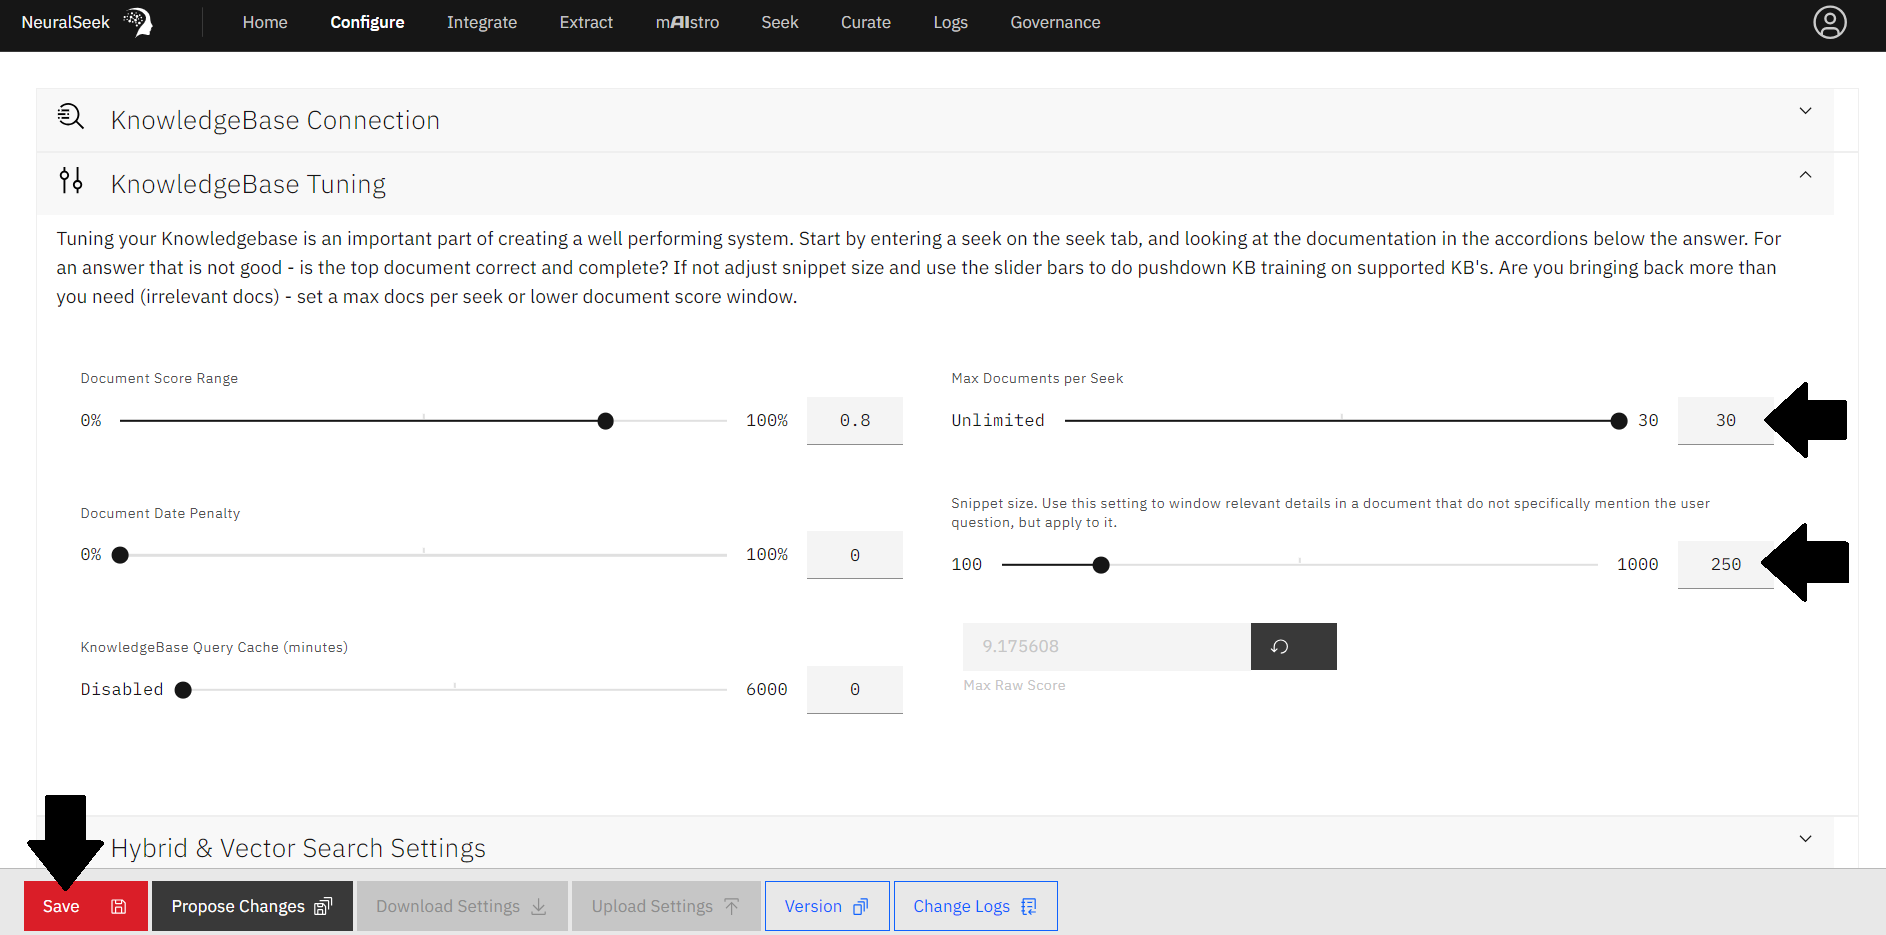
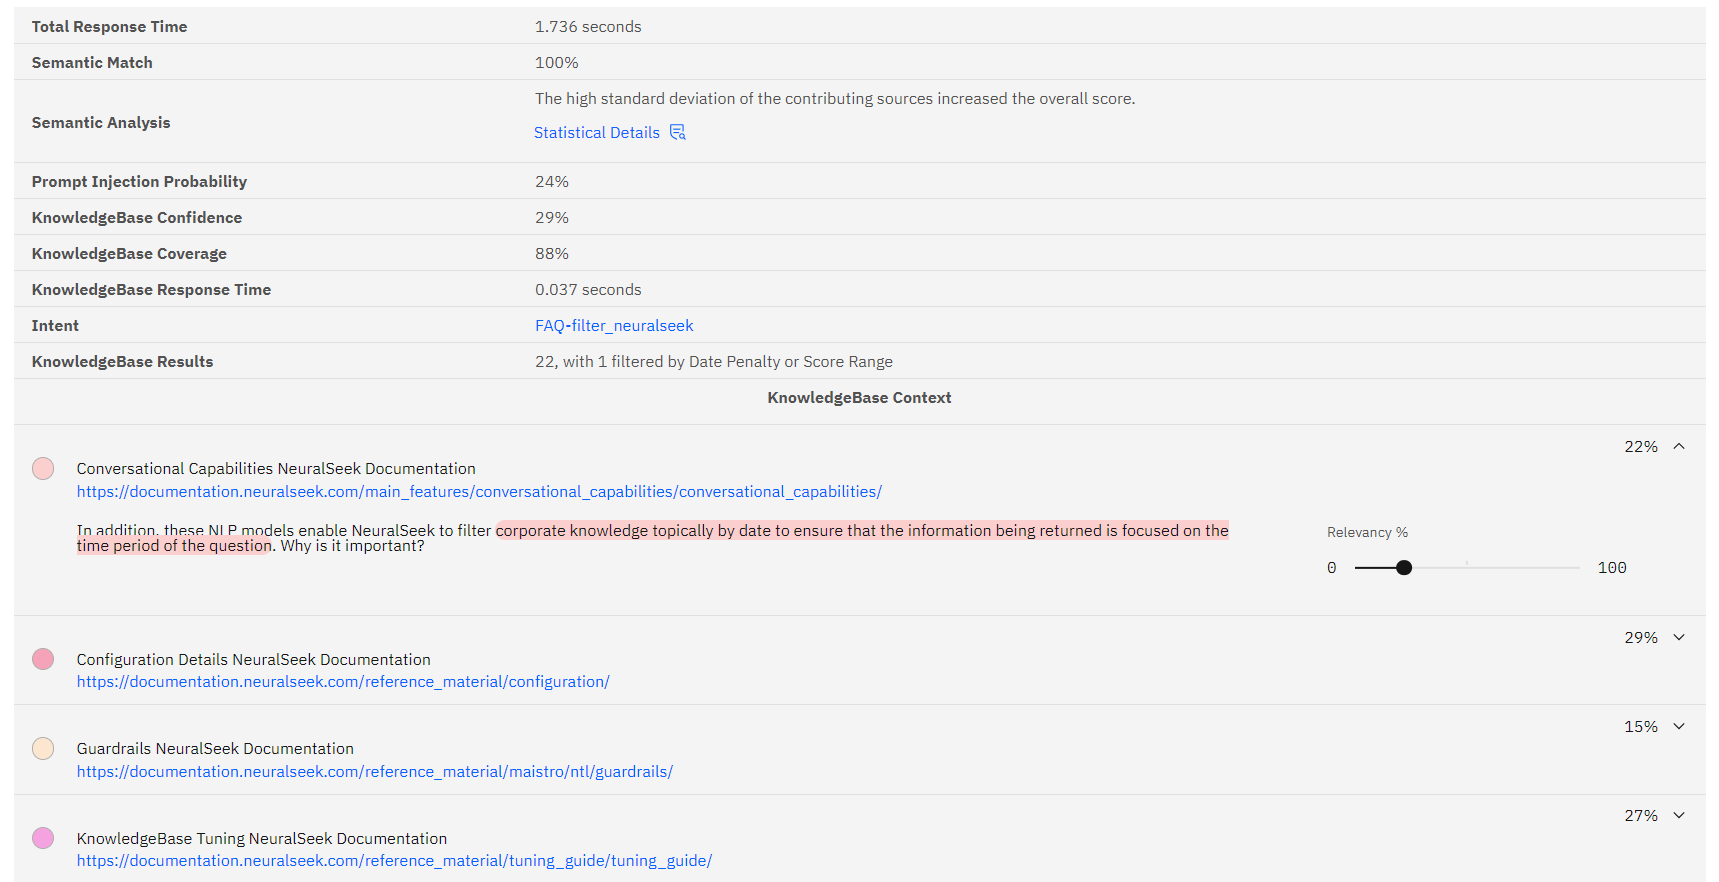
Now, let's take a look at how our generated answers are affected when the Max Documents per Seek is set to a high number, and the Snippet Size is set to a low number.
- Navigate to the
Configuretab in NeuralSeek. - Expand the KnowledgeBase Tuning accordion.
- Use the sliding scale to set the
Max Documents per Seekto 30. - Use the sliding scale to set the
Snippet Sizeto 250. - Click the red Save button to save your setting changes.
- Navigate to the
Seektab within NeuralSeek. - Query
"How does NeuralSeek filter?" - View the output below.
- Navigate to the KnowledgeBase Tuning section of the
Configuretab to reset the values to the optimal settings of:- Max Documents per Seek: 4
- Snippet Size: 500
- Click Save.
Reducing the Document Score Range
Document Score Range dictates the range of possible relevance scores that NeuralSeek will return as the result. For example, if the score range is set to 0.8, the results will be of documents with a relevance score between the range of 20% to 100%. When the Document Score Range is lowered, there is a greater stringency in sending the best matched result.
Let's see how reducing the Document Score Range affects our Seek results.
- Navigate to the
Configuretab in NeuralSeek. - Expand the KnowledgeBase Tuning accordion.
- Use the sliding scale to set the
Document Score Rangeto 0.2, or 20%. - Click the red Save button to save your setting changes.
- Navigate to the
Seektab within NeuralSeek. - Query
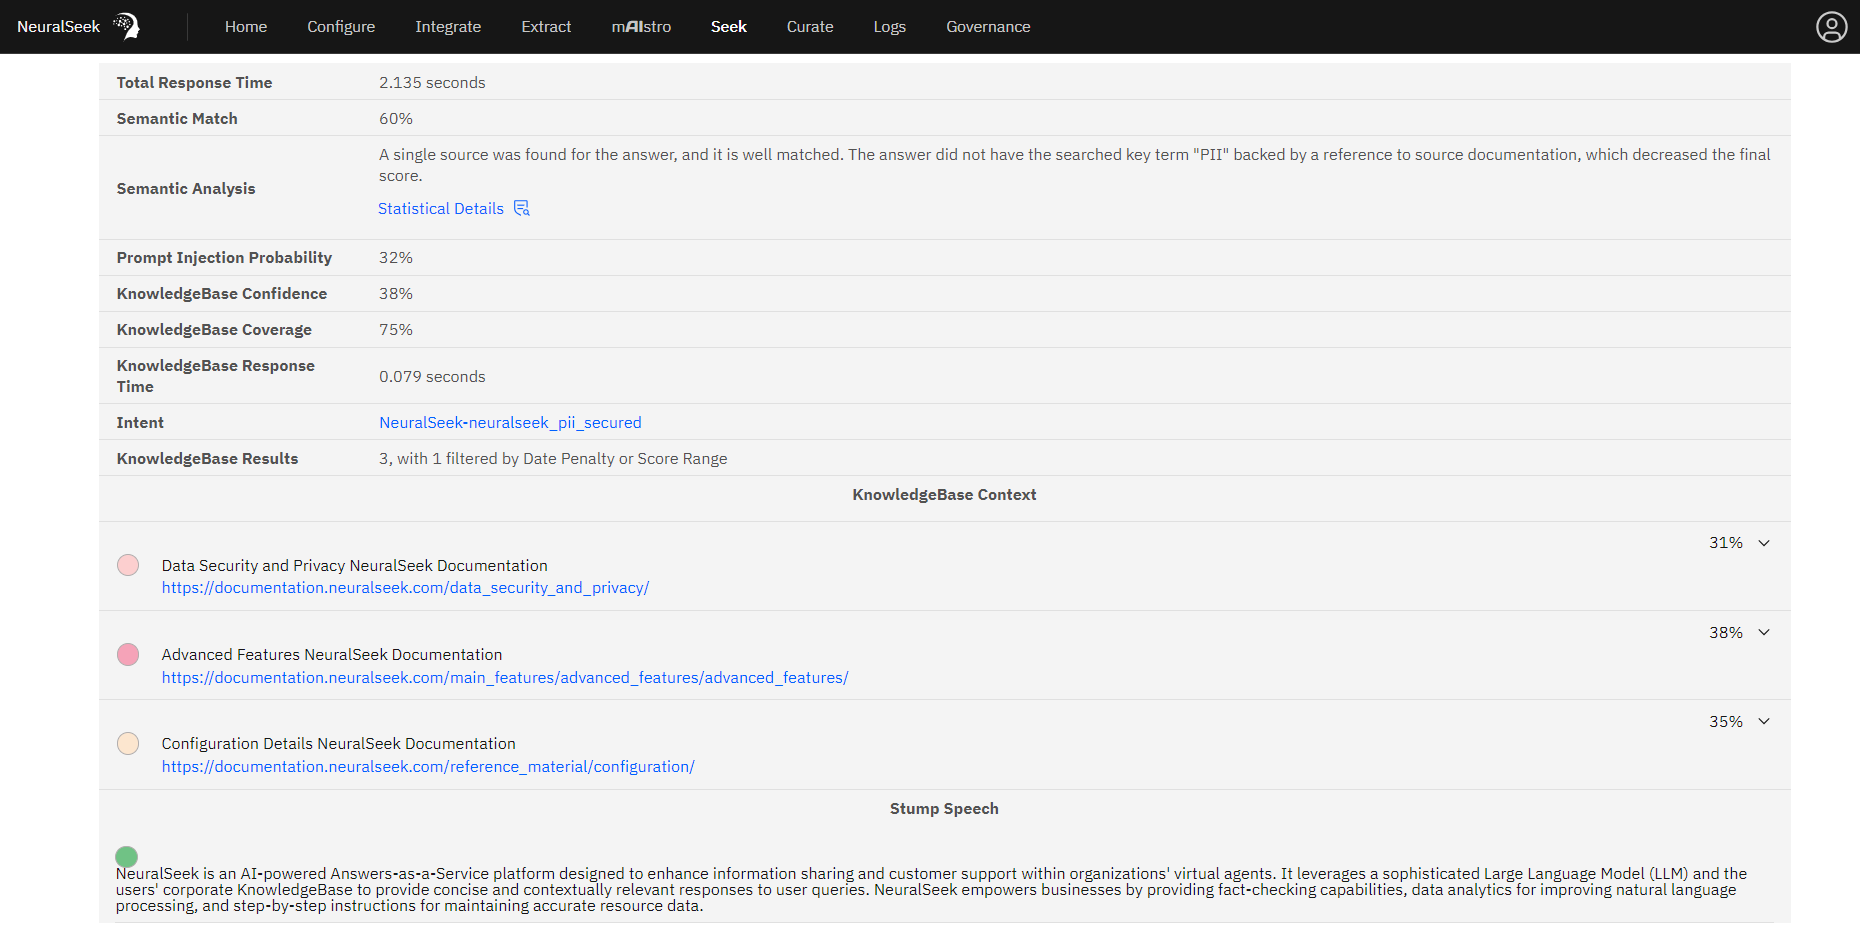
"How is PII secured by NeuralSeek?" - View the output below. The top 20% of our top scoring documents for this query were sent back for answer generation.
- Navigate to the KnowledgeBase Tuning section of the
Configuretab to reset the Document Score Range value to the optimal settings of 0.8, or 80%. - Click Save.
Prioritizing Documentation
The Re-Sort Values List tool allows users to prioritize values, without entirely excluding other values.
Let's look at an example where we would like to prioritize the content in our sources in our KnowledgeBase to generate answers.
- Navigate to the
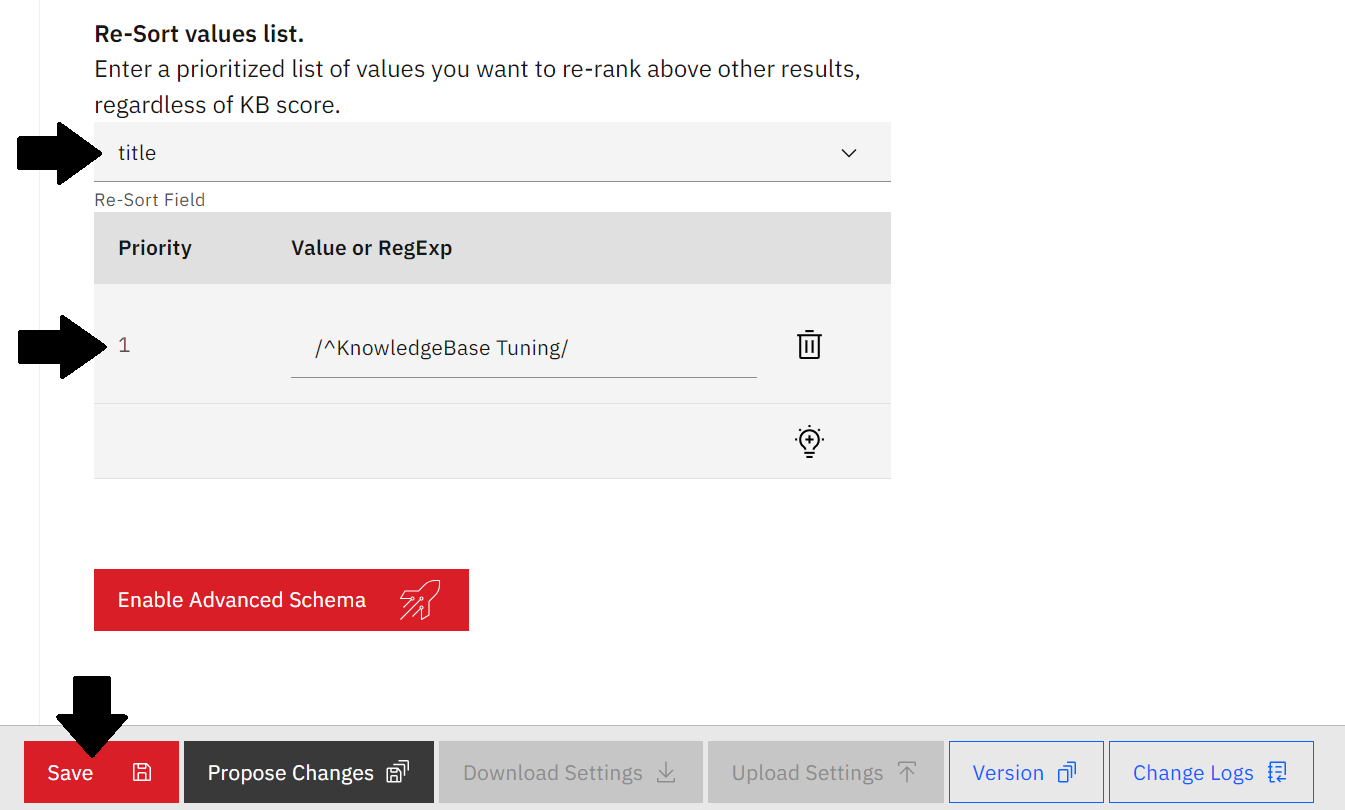
Configuretab in NeuralSeek. - Expand the KnowledgeBase Connection accordion.
- In the Re-Sort field, add the metadata property of
title. - Click the light bulb icon to add a new priority row.
- For Priority 1, add
/^KnowledgeBase Tuning/as the value. This will prioritize values beginning with "KnowledgeBase Tuning" - with our goal being the KnowledgeBase Tuning NeuralSeek Documentation guide - for answer generation. - Click the red Save button to save your setting changes.
- Navigate to the
Seektab within NeuralSeek. - Query
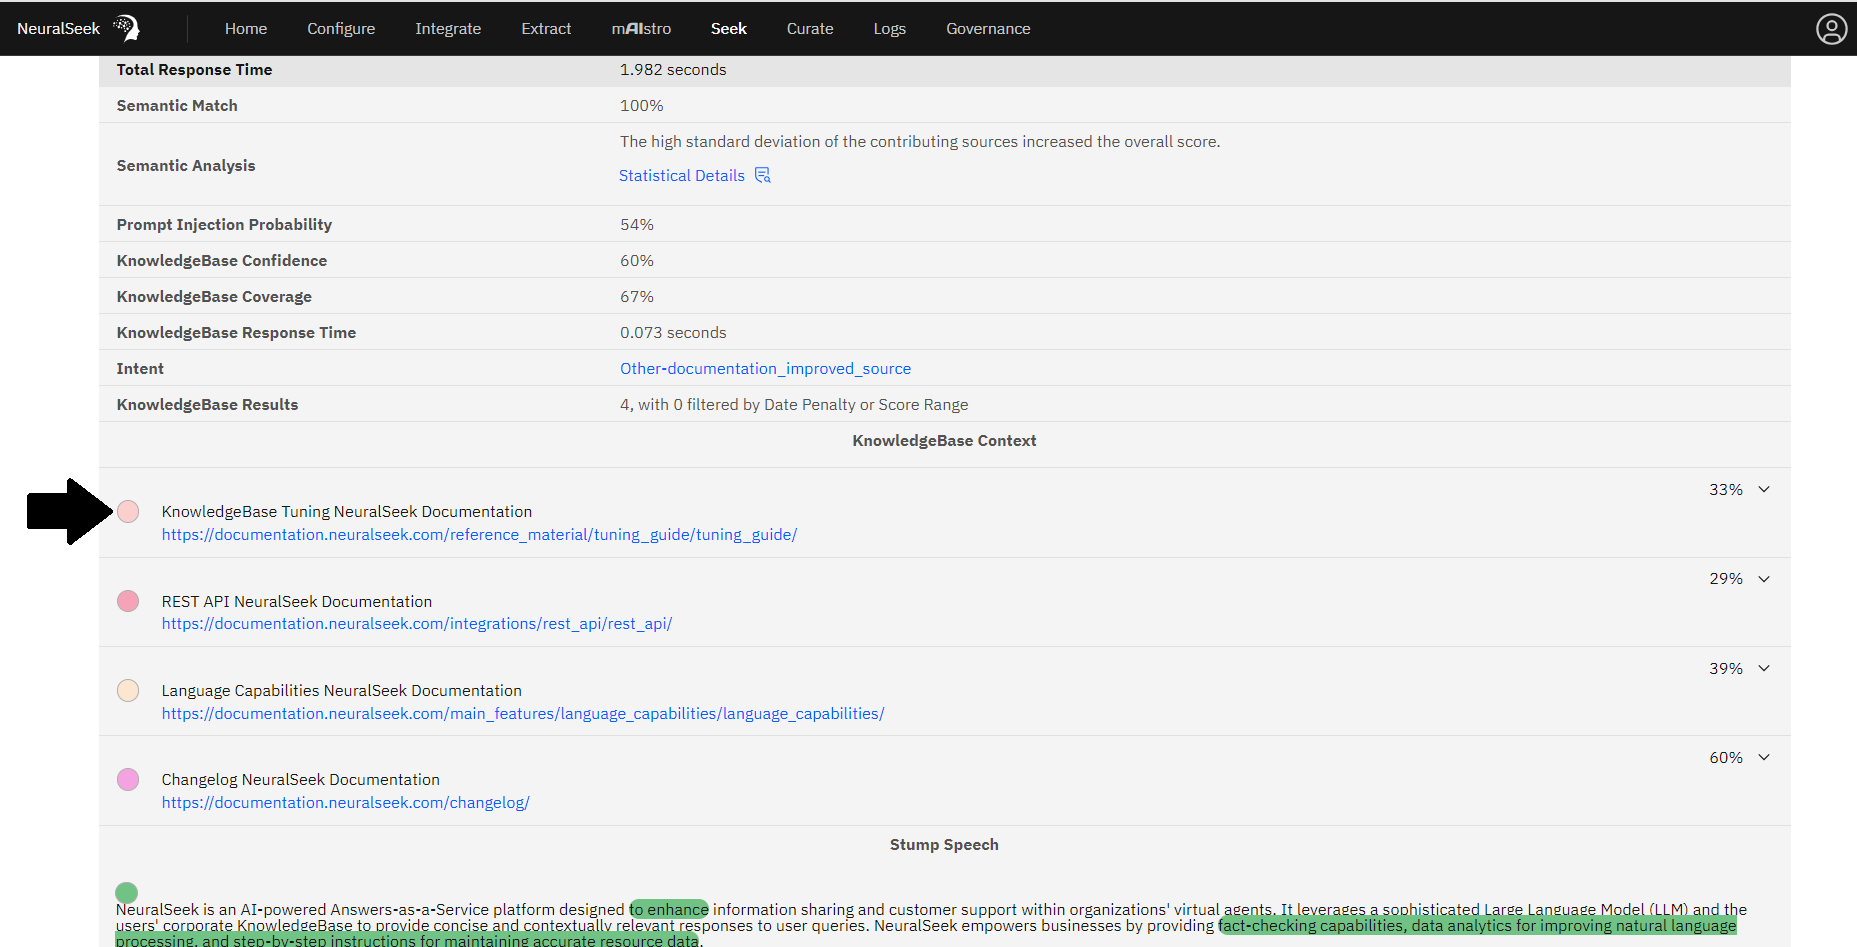
"How can source documentation be improved?" - View the output below. Prioritization of the document titled "KnowledgeBase Tuning NeuralSeek Documentation" is occurring behind the scenes. The KnowledgeBase Context details is based on visual ranking, so while a different source may appear at the top of that section, the prioritization of the content from the KnowledgeBase Tuning document still occurs for answer generation.
Governance of Intent Analytics
NeuralSeek's Governance tab serves as a centralized platform where users can access various insights and metrics related to the governance of their NeuralSeek system.
Configuration Insights
- Navigate to the Governance Tab within NeuralSeek
- Click
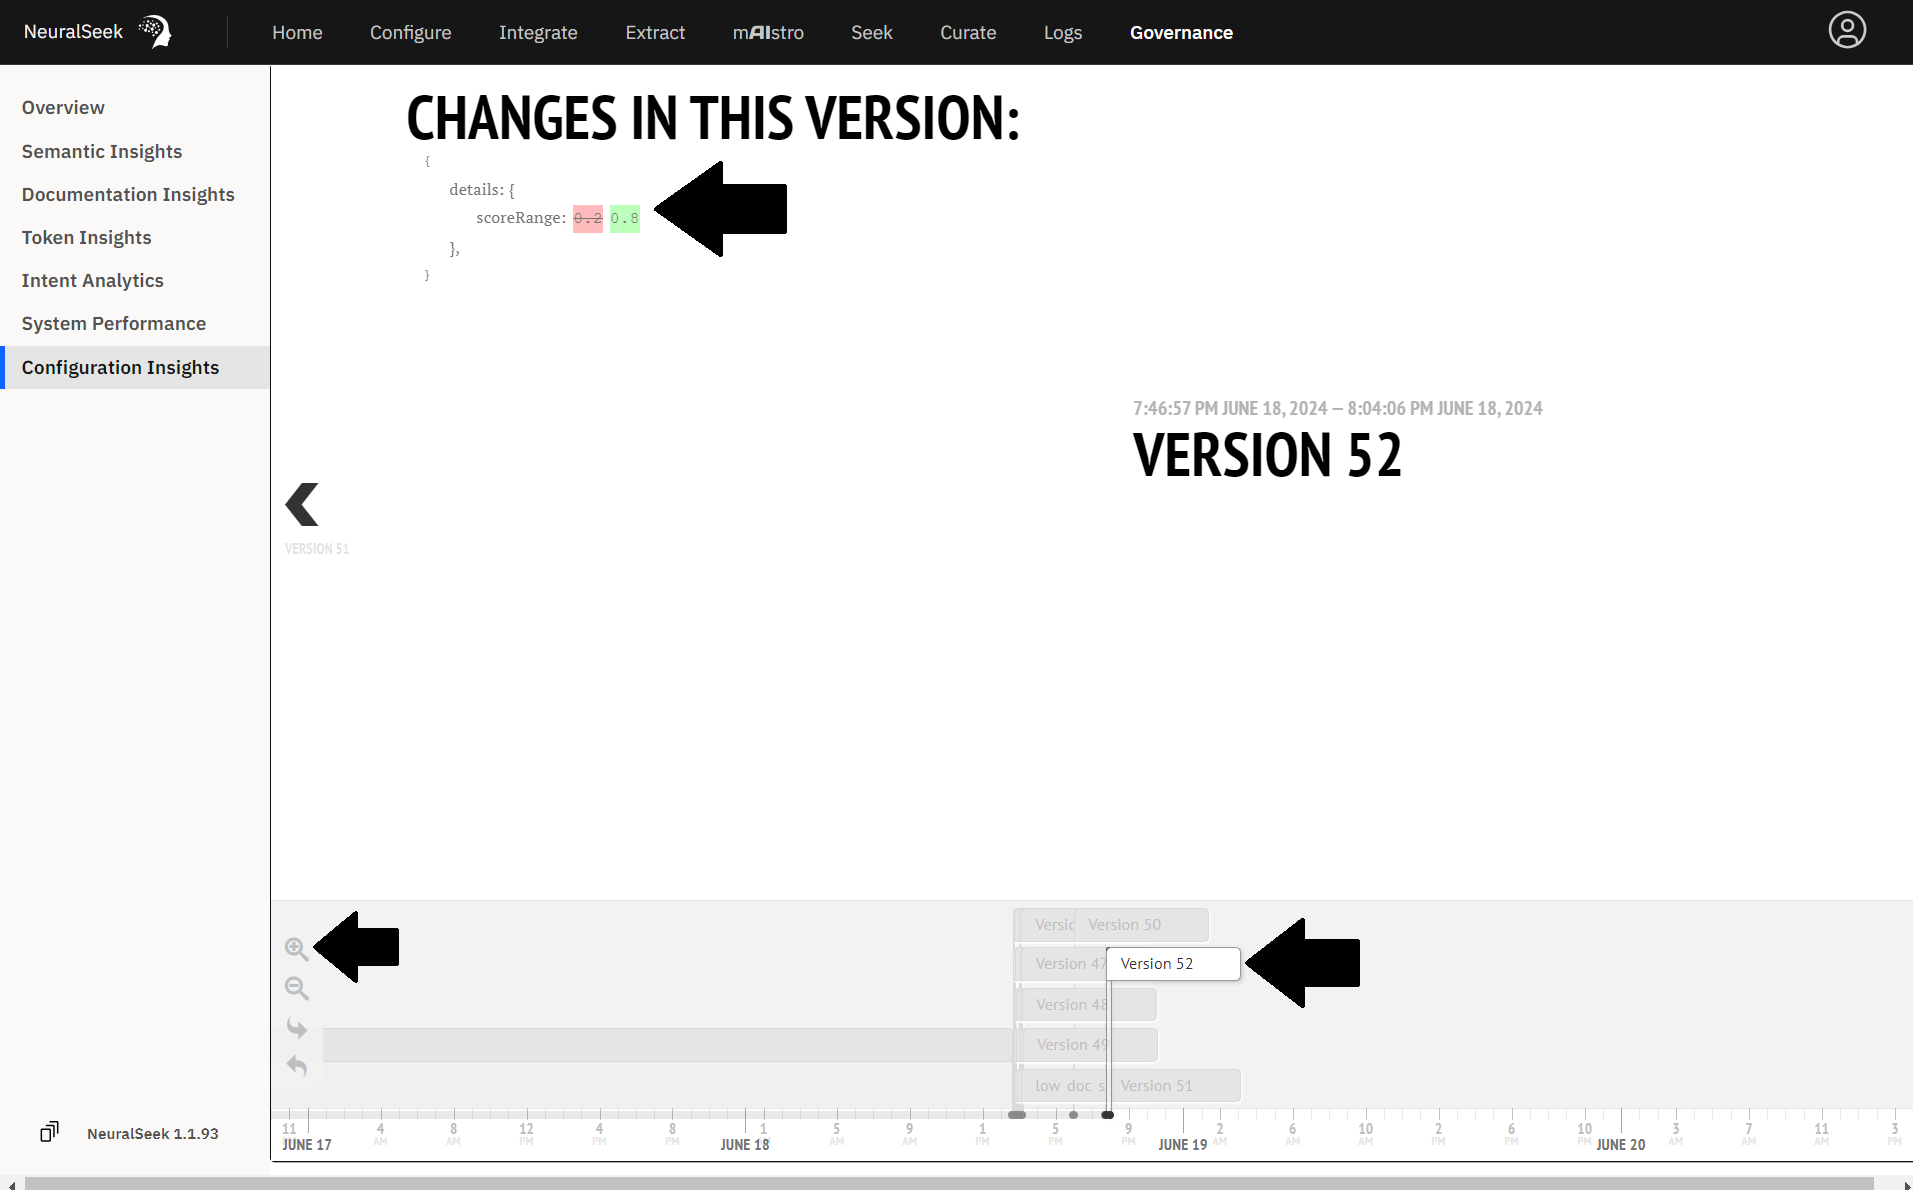
Configuration Insights. Here, we can review each version of our NeuralSeek configuration containing the different changes made during the NeuralSeek tuning steps. - Click on a version to show the modifications made in the Configure tab.
- Click the magnifying glass with a plus icon to zoom in on today's date.
Documentation Insights
- Click
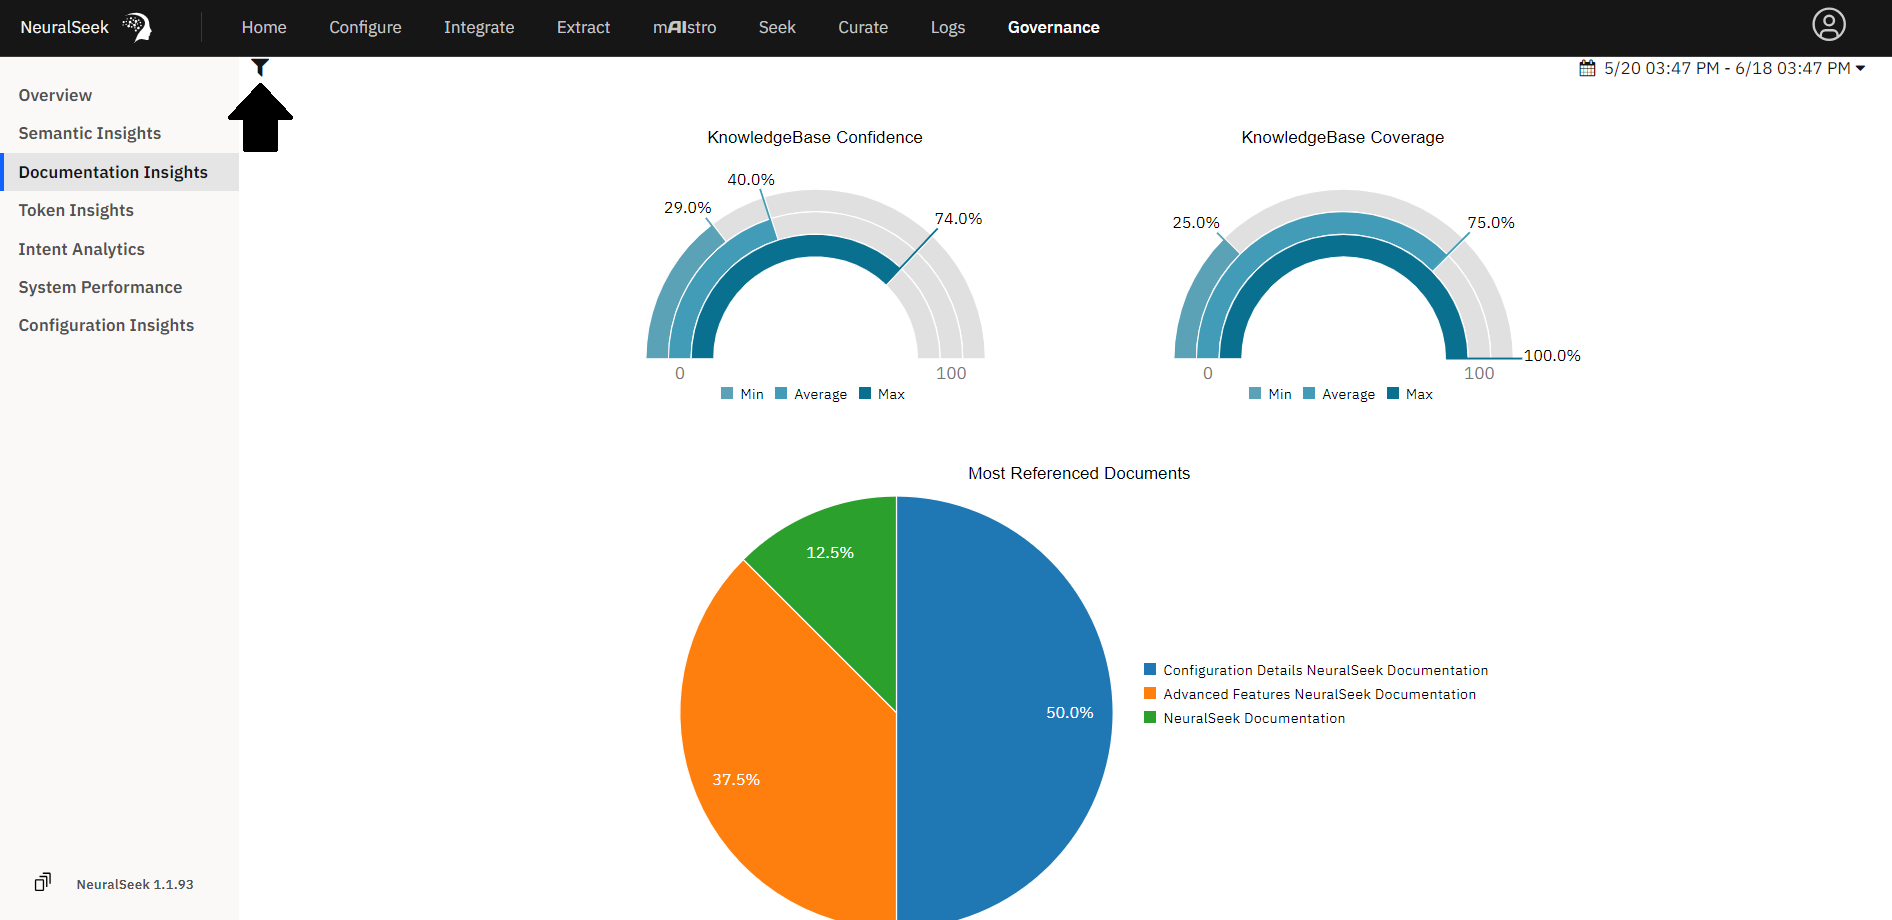
Documentation Insights. Here, we can review the sources and references frequently used by NeuralSeek for answer generation.
- Click on the filter icon in to top left corner.
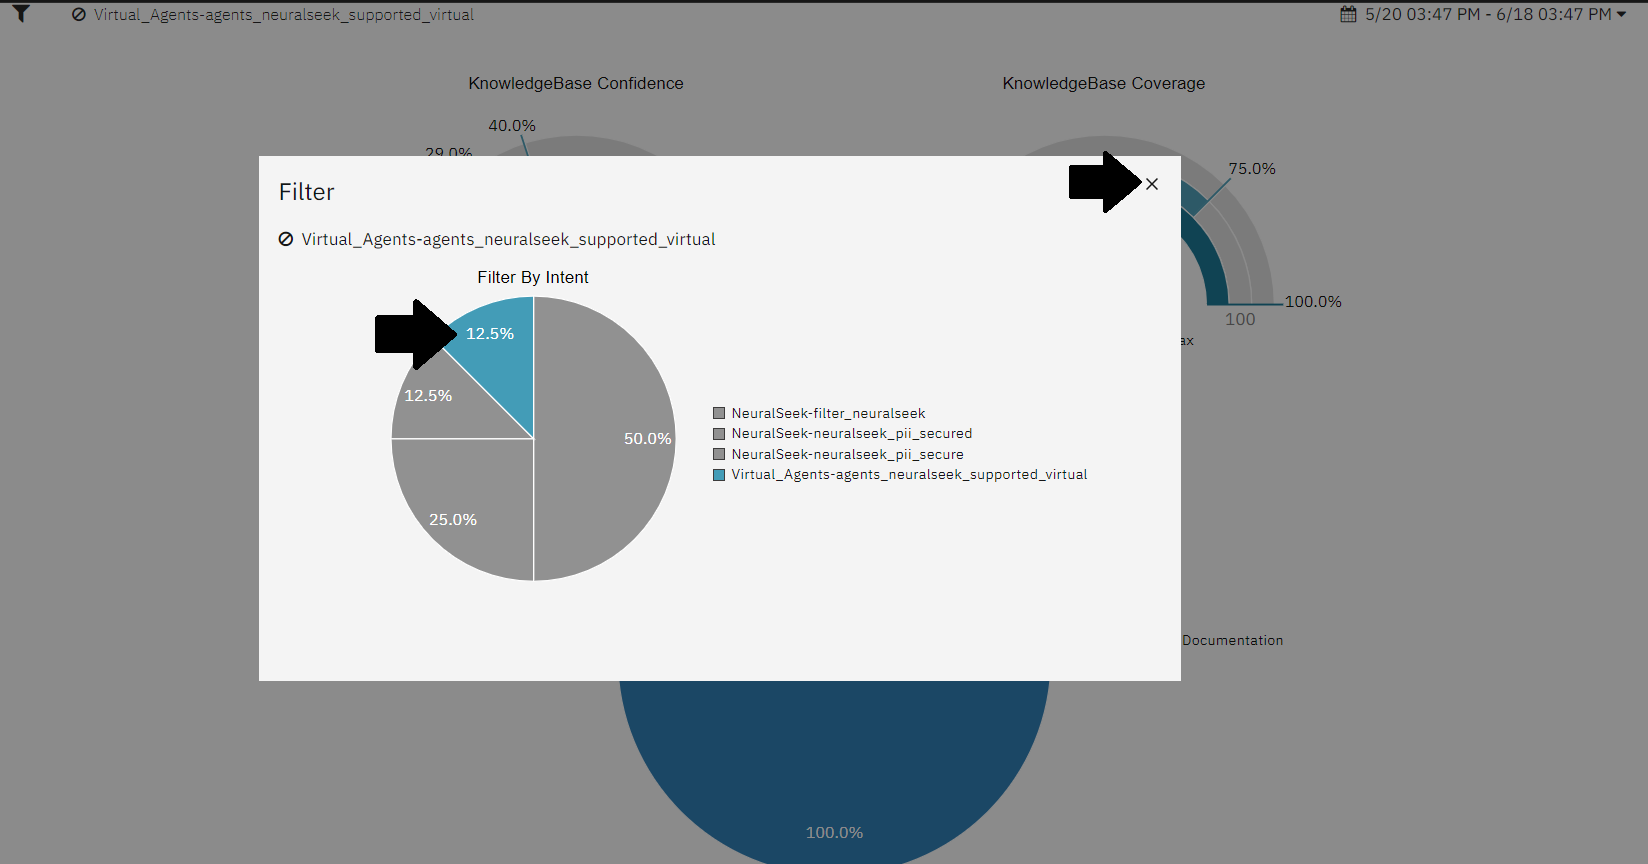
- Click on an intent to filter by, then click the 'x' in the right corner to close the filter screen.
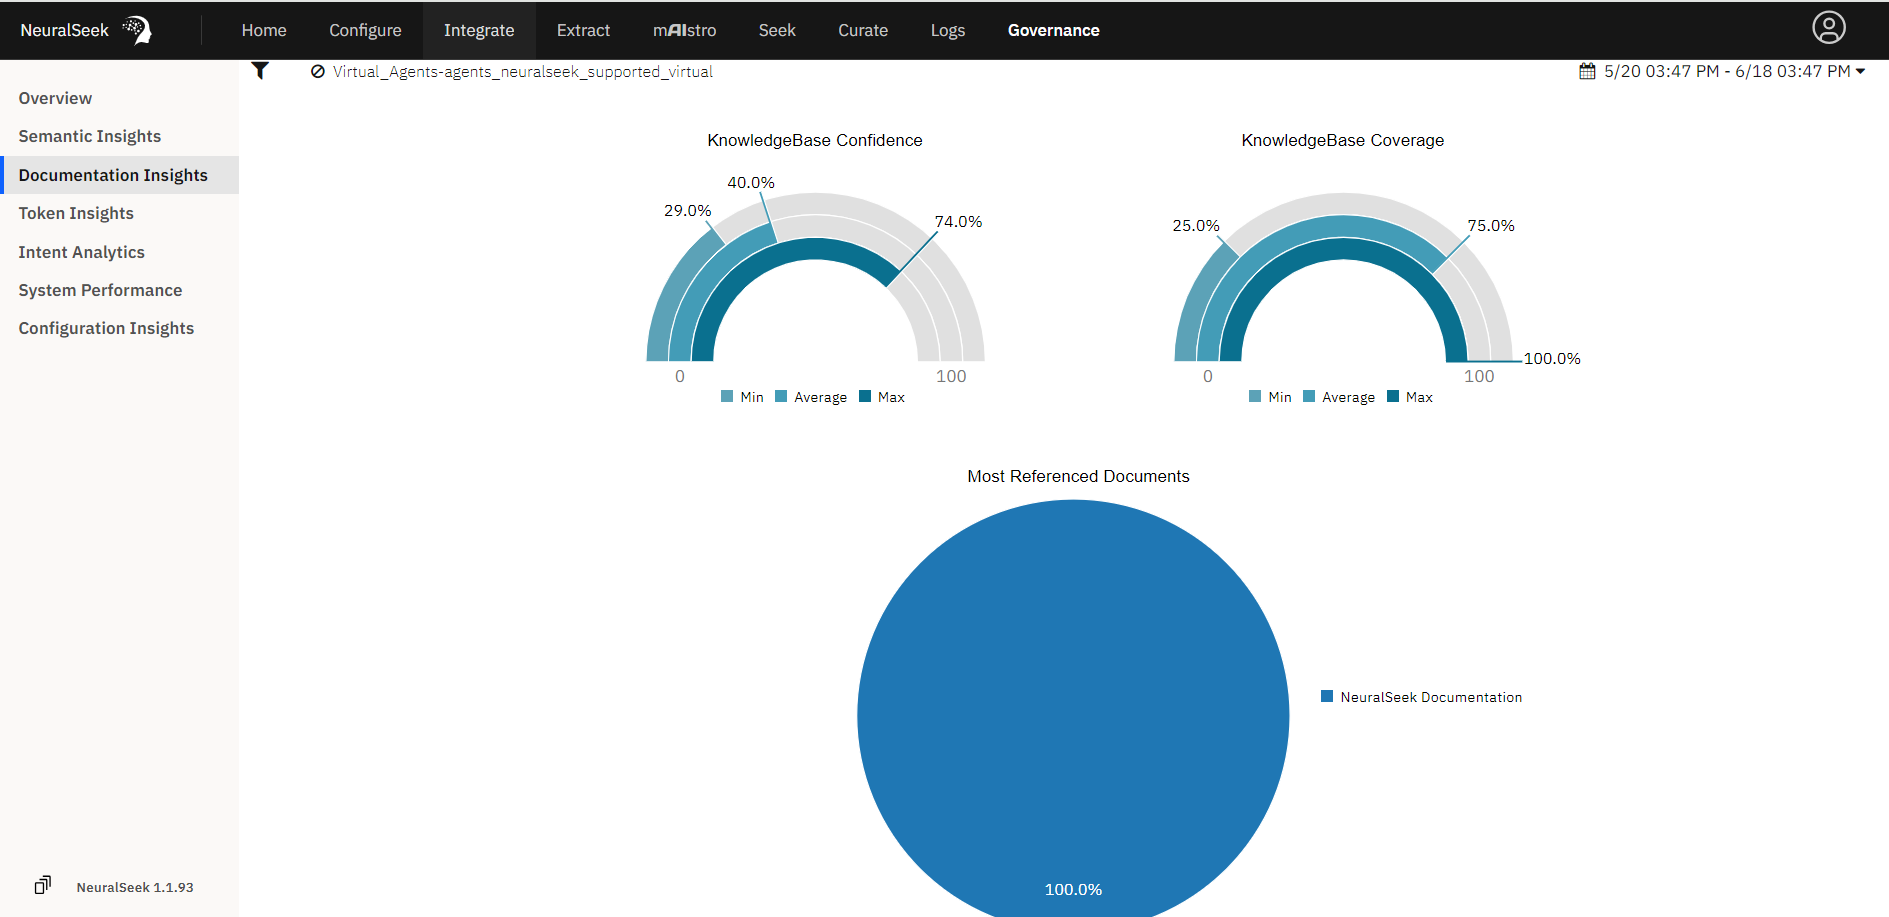
- Notice how the graphs change to provide details on the documentation related to that filtered intent.
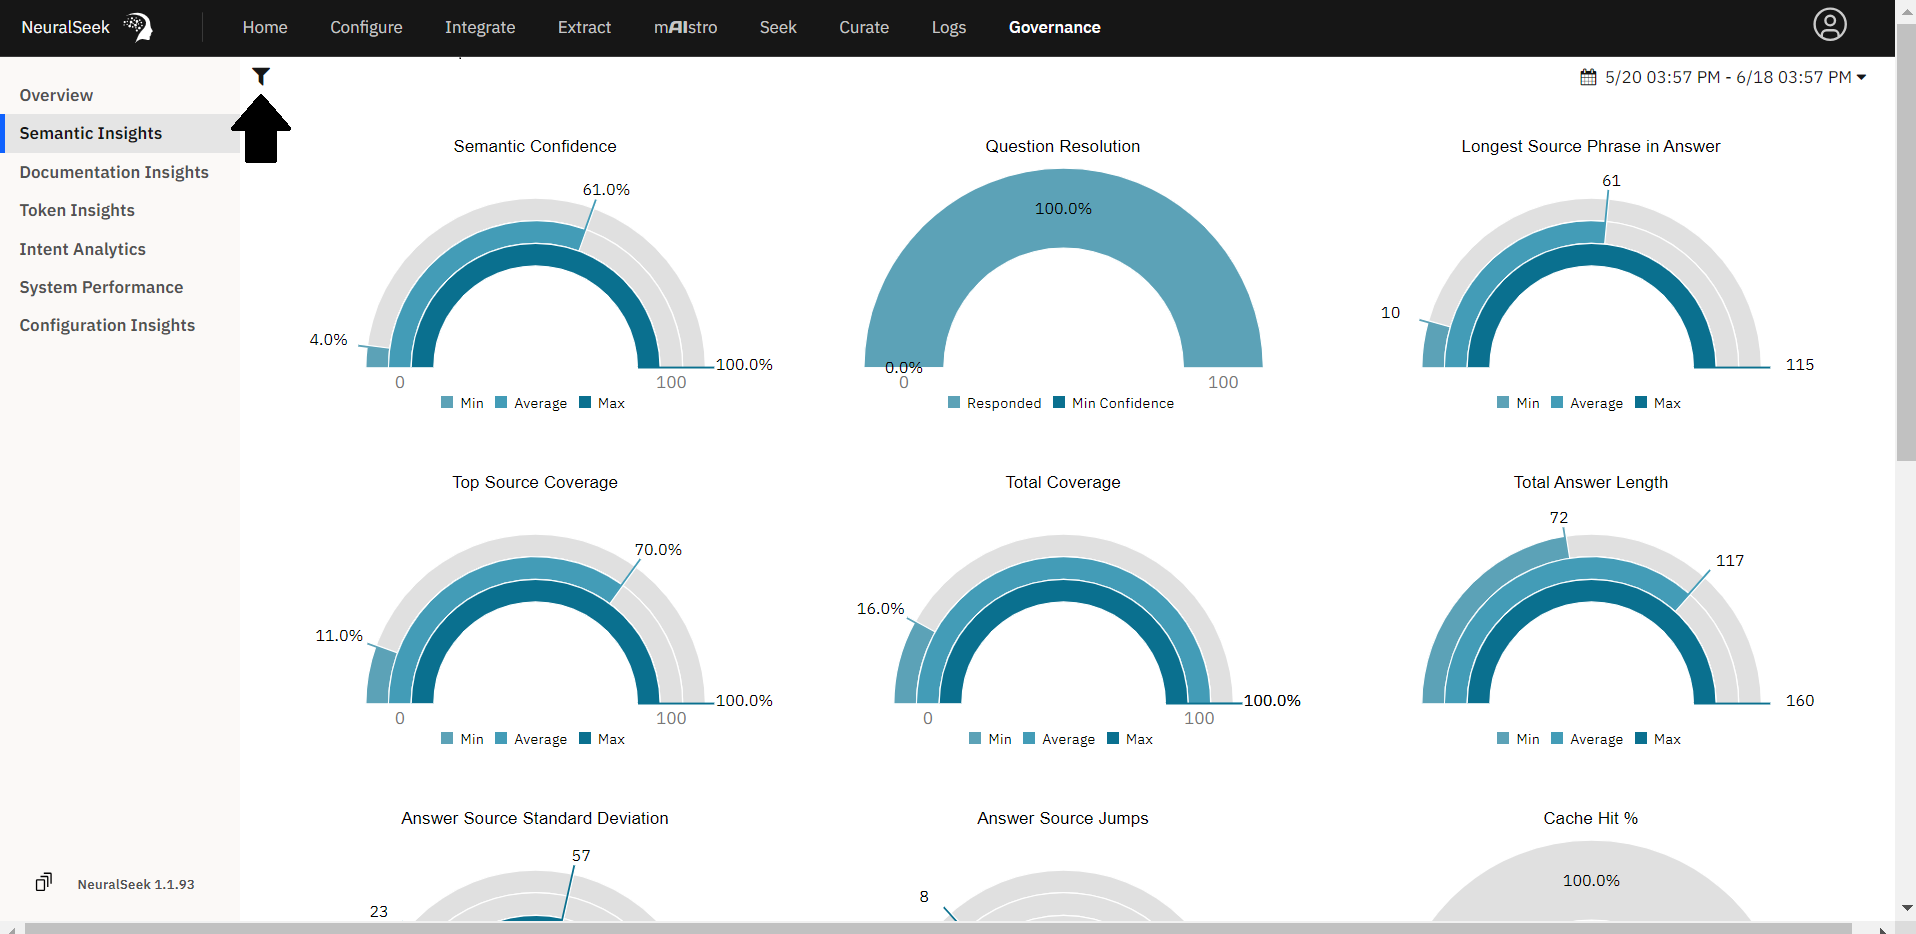
Semantic Insights
- Finally, click
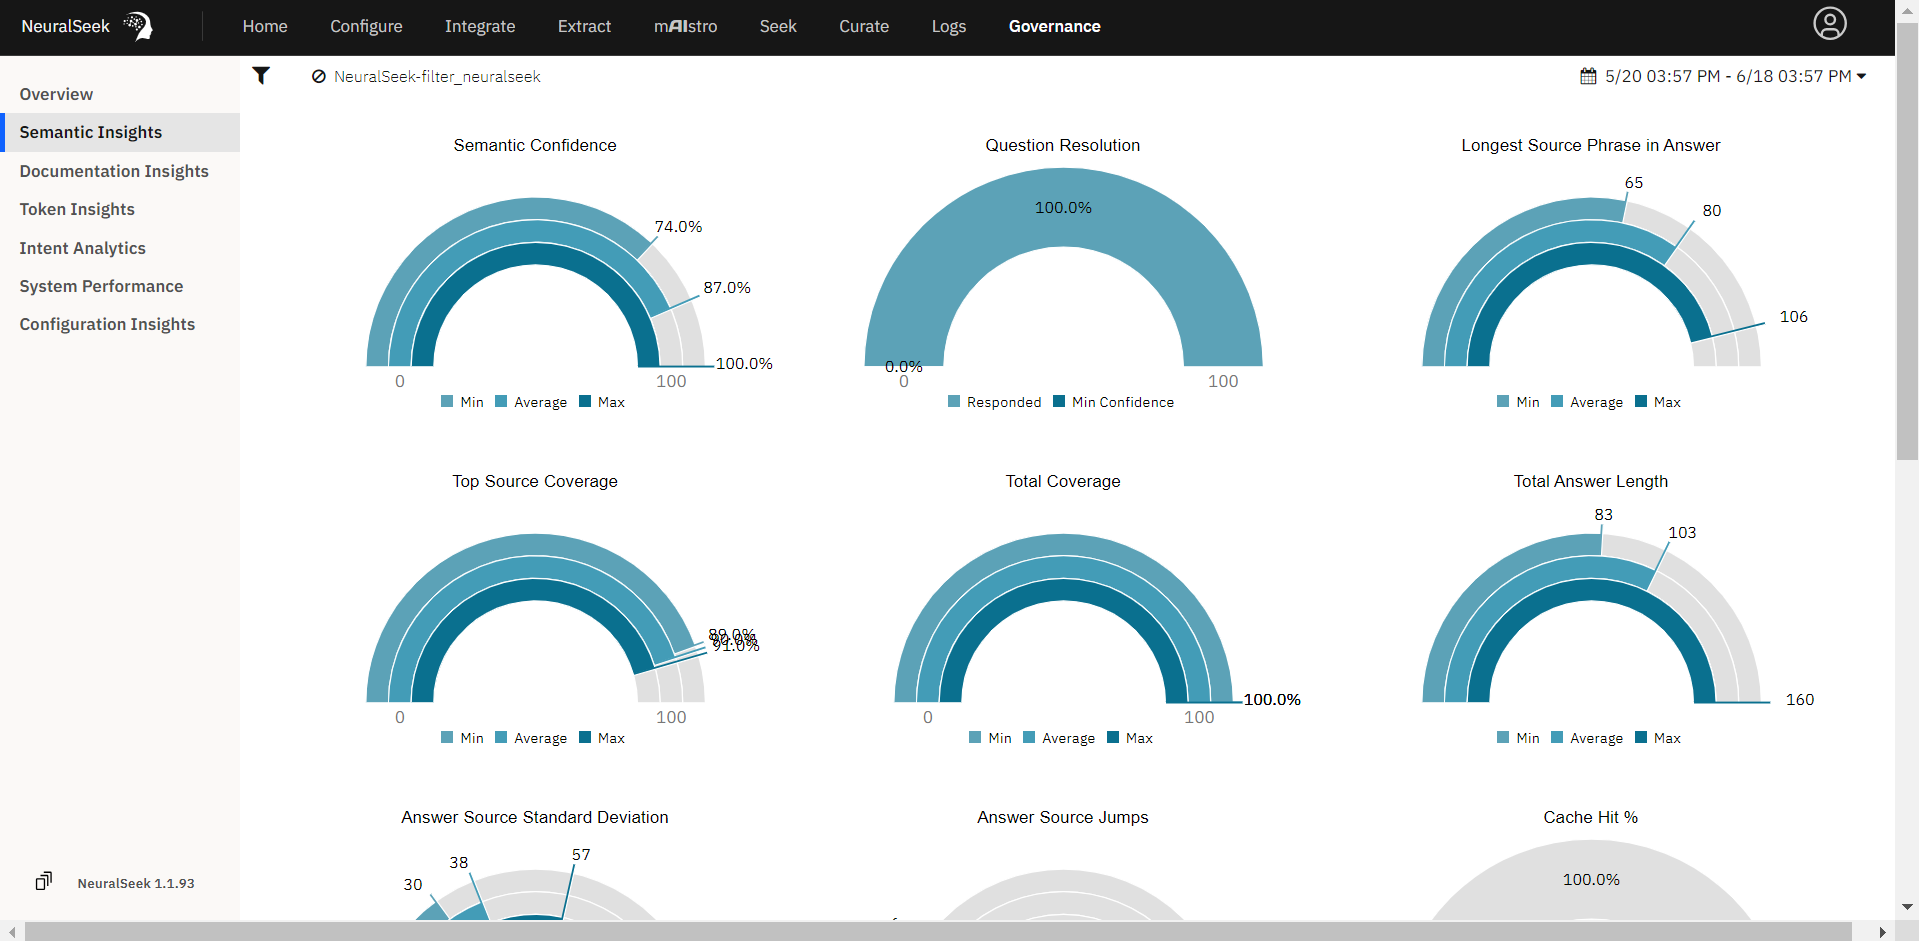
Semantic Insights. Here, we can view graphs with insights on our Semantic Confidence, Top Source Coverage, Source Jumps, and more. This gives users a deeper understanding of the context generated, and allows users to monitor the quality.
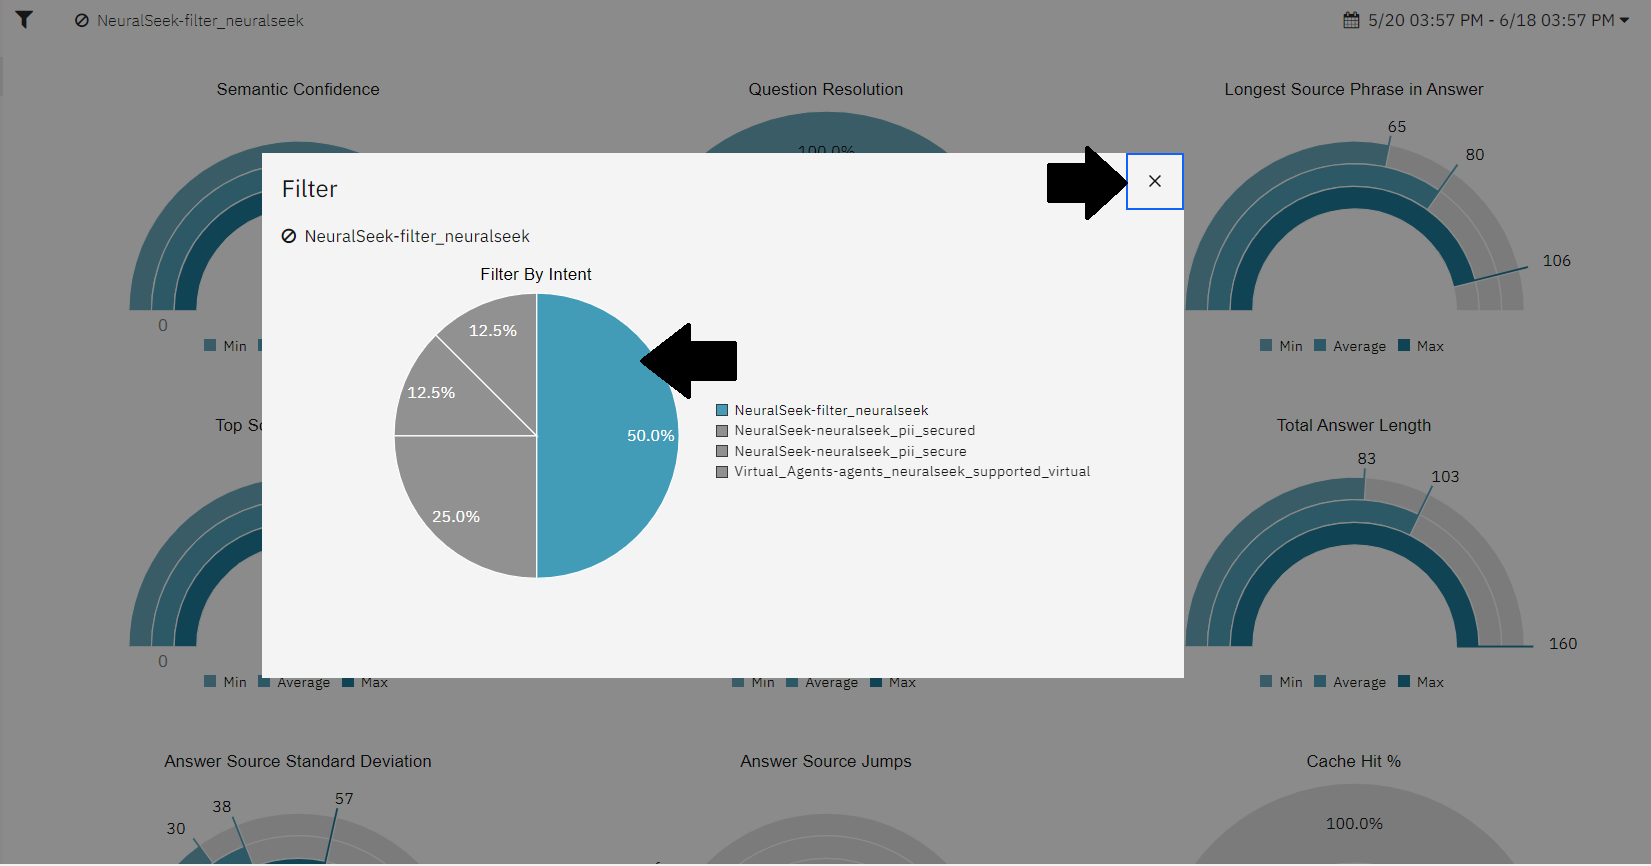
- Click the filter icon in the top left corner.
- Click on an intent to filter by, then click the 'x' in the right corner to close the filter screen.
- Notice how the graphs change to provide a more narrow analysis into the semantic insights of the filtered intent.
PII Handling
NeuralSeek features an advanced Personal Identifiable Information (PII) detection routine that automatically identifies any PII within user inputs. It allows users to maintain a secure environment while still providing accurate responses to user queries.
Turn Off "Force Answers from the KnowledgeBase"
Navigate to the Configure screen in NeuralSeek and expand the Answer Engineering & Preferences details.
- Change the "Force Answers from the KnowledgeBase" selection to False.
We configure this setting for optimal answer generation for this next example, since the information will not be in our source documentation.
Set LLM - Based PII Filters
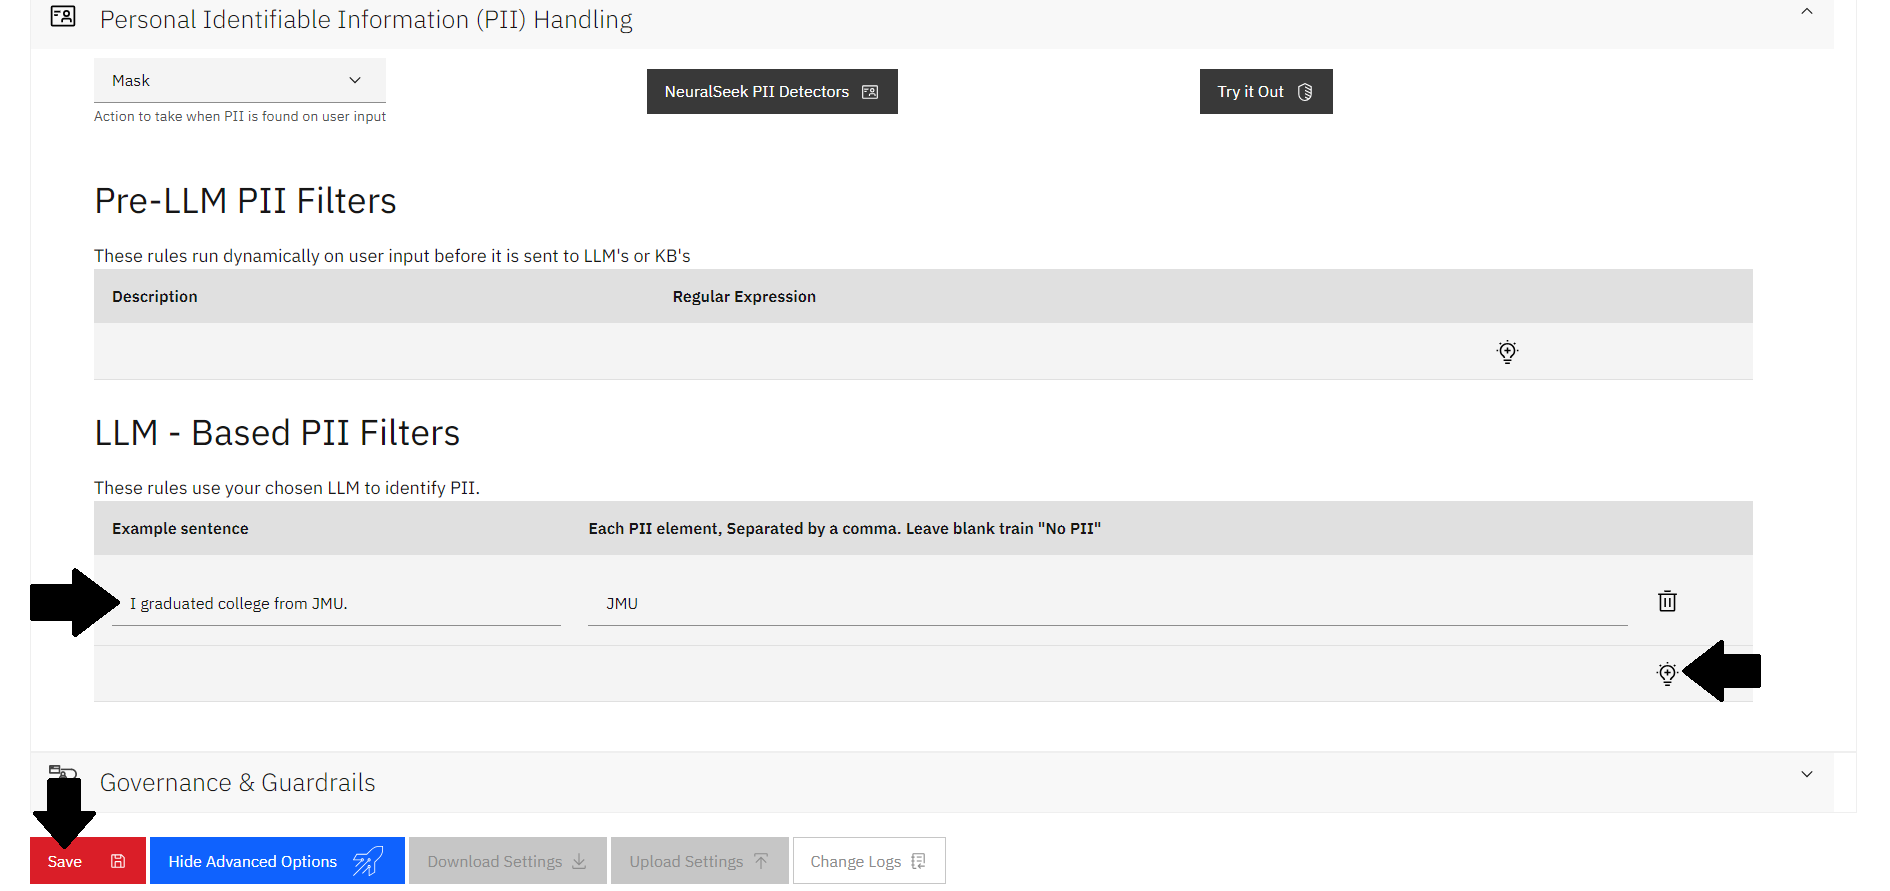
Expand the Personal Identifiable Information (PII) Handling details.
- Click the light bulb icon to add a new row.
- Add an example sentence. For example:
I graduated college from JMU. - In the box to the right, add the PII element of the example sentence. In this example:
JMU. - Click the red Save icon at the bottom of the screen.
Seek an Answer
Navigate to the Seek screen of NeuralSeek.
- Seek the question being sure to reference the PII. In this example, seek:
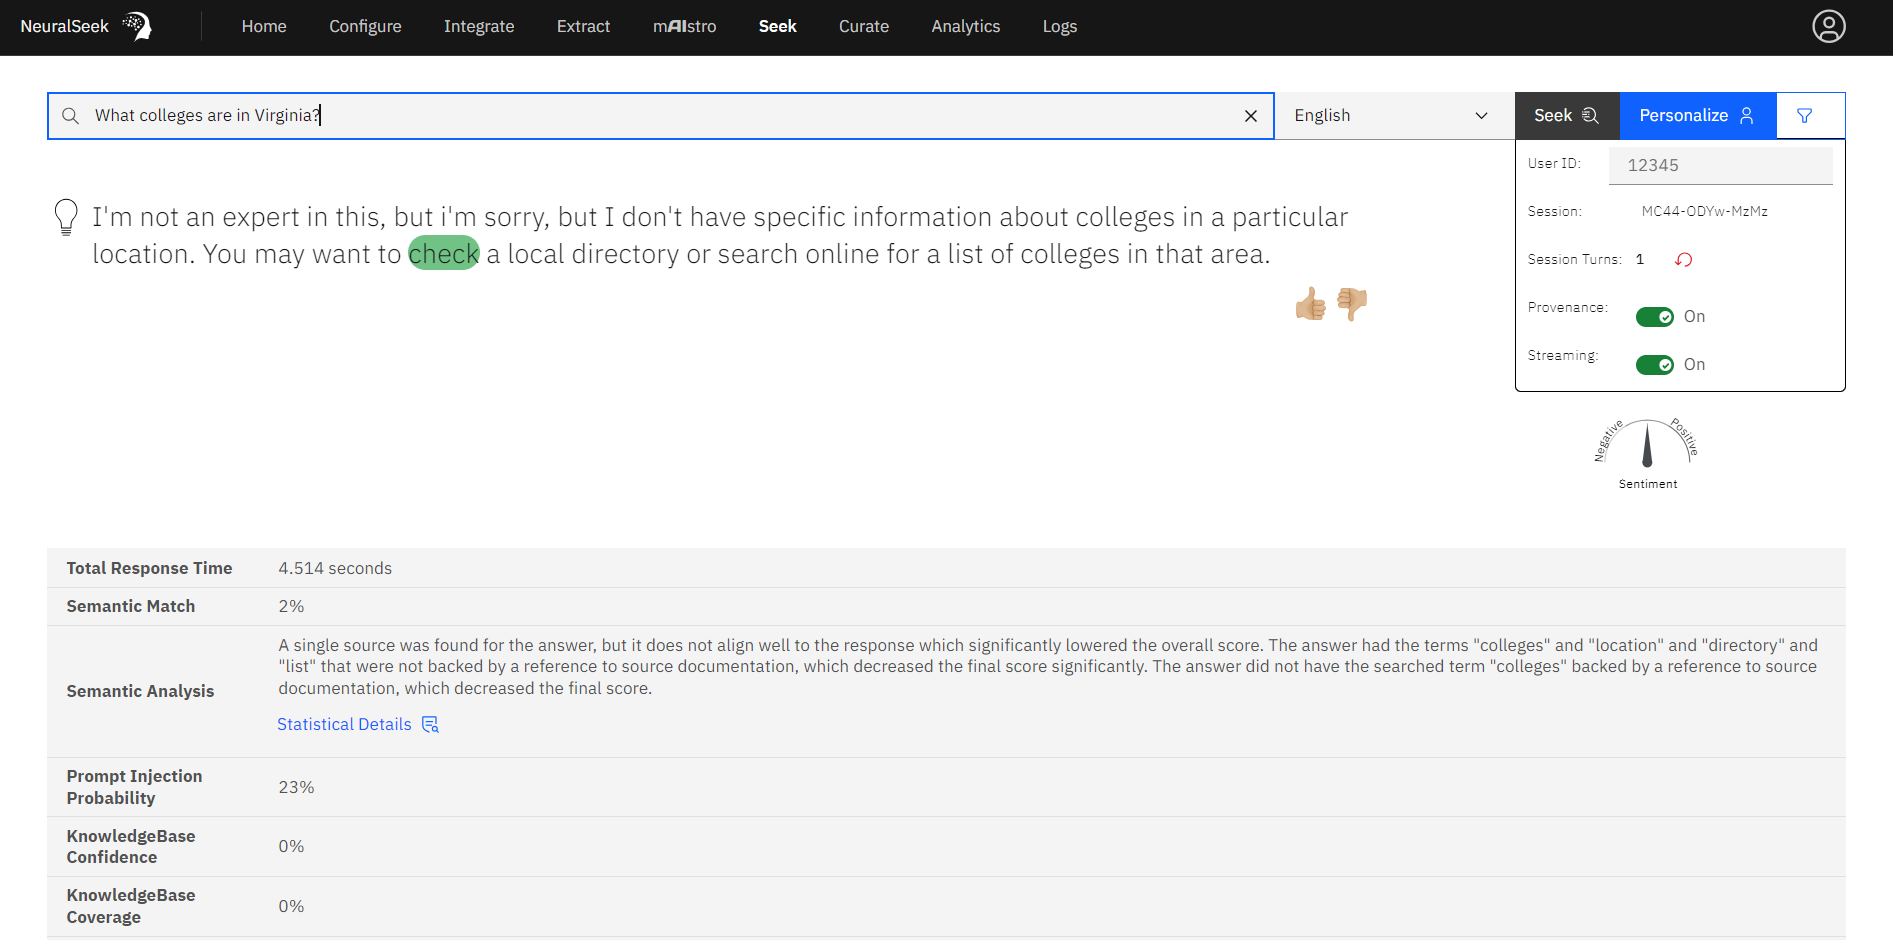
What colleges are in Virginia?
Notice the answer is vague and does not include information about specific colleges in that area.
Inspect PII
Navigate to the Curate screen in NeuralSeek. Here, we can see that newly created intent with a symbol indicating that this intent contains PII.
- Expand the intent to view the answers. Notice how the location of "Virginia" that we asked in the question is masked to hide the PII.
Ask an Additional Question
Optionally, you can continue to seek queries and view how the related PII is masked in the Curate screen. For example, seek the question, Where is JMU located?.
- The answer will be vague and not contain information regarding the location due to it containing PII.
- In the Curate screen, the intent will appear with the same symbol indicating PII. Inside the query,
JMUwill also be masked to protect the PII.
